Deploying a project
When you are ready to use your interactive visualization, live notebook or machine learning model, you deploy the associated project. You can also deploy someone else’s project if you have been added as a collaborator on the project. See Collaborating on projects for more information.
When you deploy a project, Anaconda Enterprise finds and builds the software dependencies—all of the libraries required for it to run—and encapsulates them so they are completely self-contained. This allows you to easily share it with others.
You configure how a project is deployed by adding the appropriate command to run the project in the configuration file anaconda-project.yml. You can also accept the default command, like the following example Bokeh app:
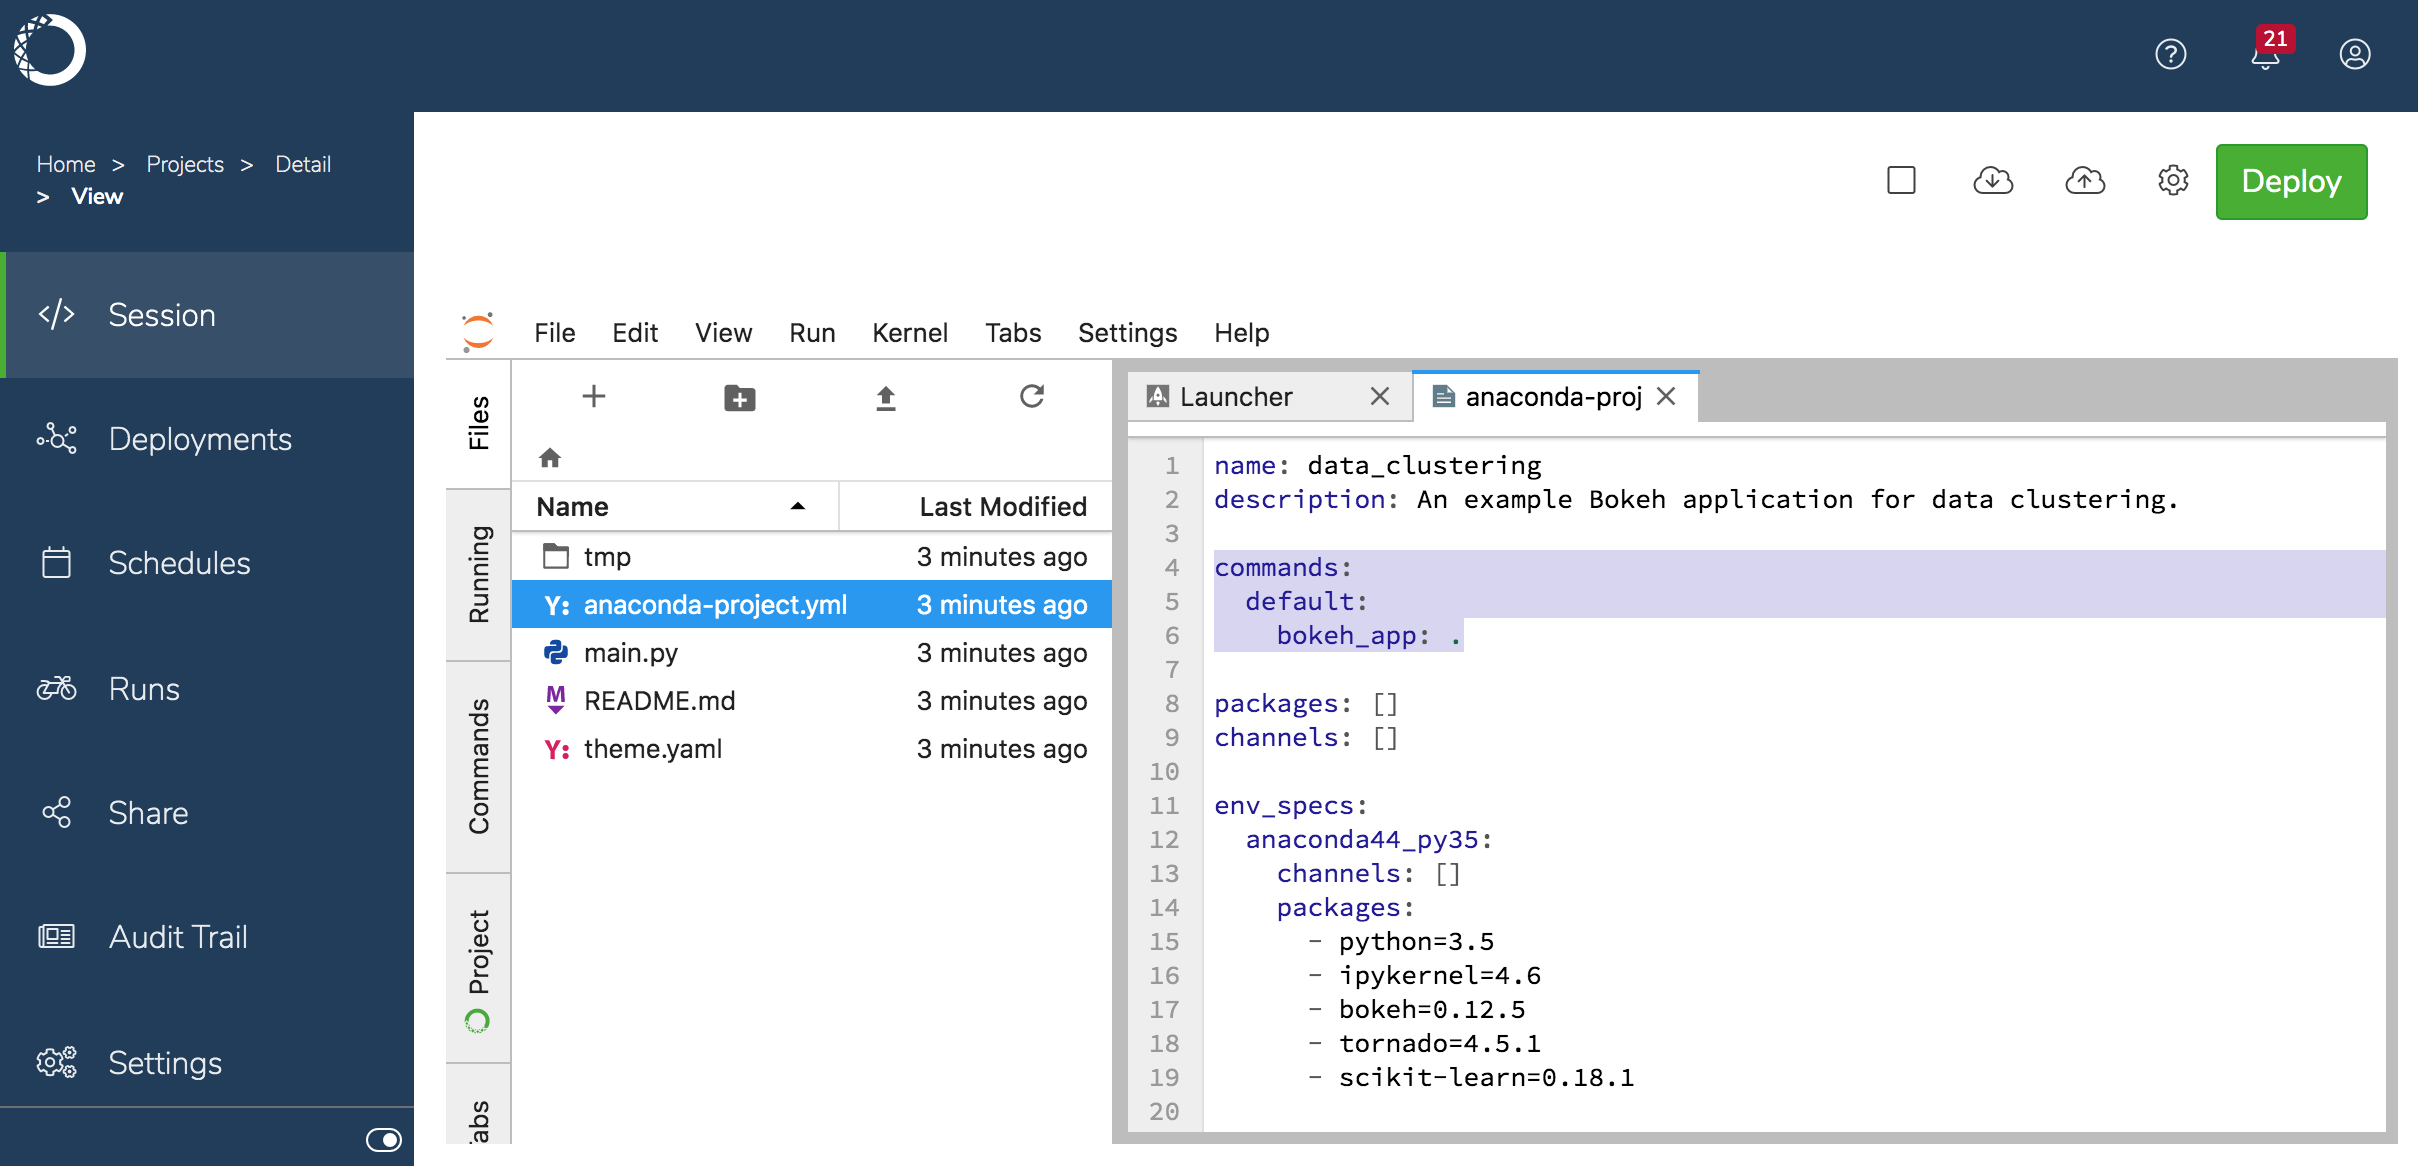
See Configuring project settings for more information about adding deployment commands to project.
To deploy a project:
- Select it in the Projects list and click Deploy.
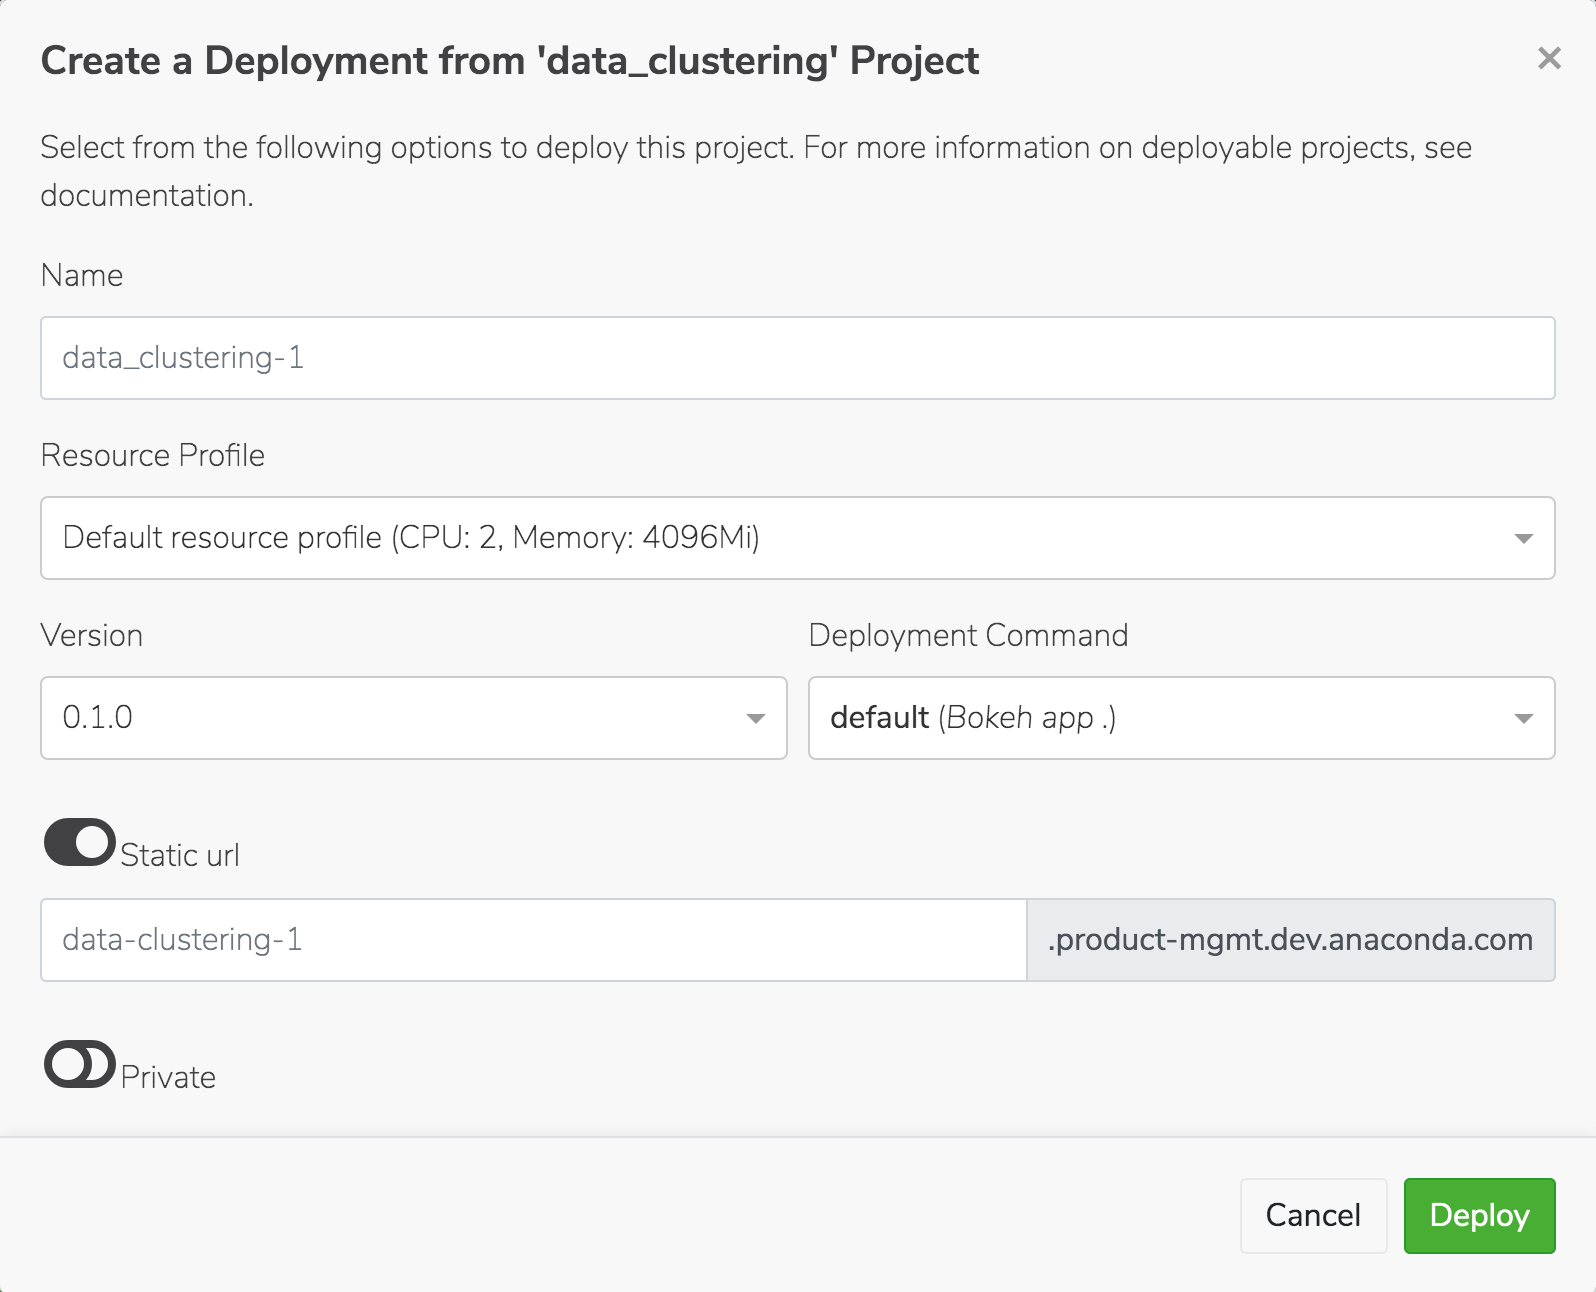
Choose the runtime resources your project requires to run from the Resource Profile drop-down, or accept the default. Your Administrator configures the options in this list, so check with them if you aren’t sure.
If there are multiple versions of the project, select the version you want to deploy.
Select the command to use to deploy the project. If there is no deployment command listed, you cannot deploy the project.
Return to the project and add a deployment command, or ask the project owner to do so if it’s not your project. See Configuring project settings for more information about adding deployment commands.
Enter the URL where you want the deployment to be hosted in the Static URL field.
Note
This is the URL you’ll use to call the deployment from within a web application, and therefore it must be unique. Disable the Static URL toggle if you want Anaconda Enterprise to automatically generate a URL for the deployment.
- Choose whether you want to keep the deployment
Private—and therefore acessible to authenticated platform users, only—or make itPublic, and therefore available to non-authenticated users. After it’s deployed, you can share the deployment with others. - Click Deploy. Anaconda Enterprise displays the status of the deployment, then lists it in the project’s Deployments. Private deployments are displayed with a lock
 next to their name, to indicate their secure status.
Note
It may take a few minutes to obtain and build all the dependencies for the project deployment.
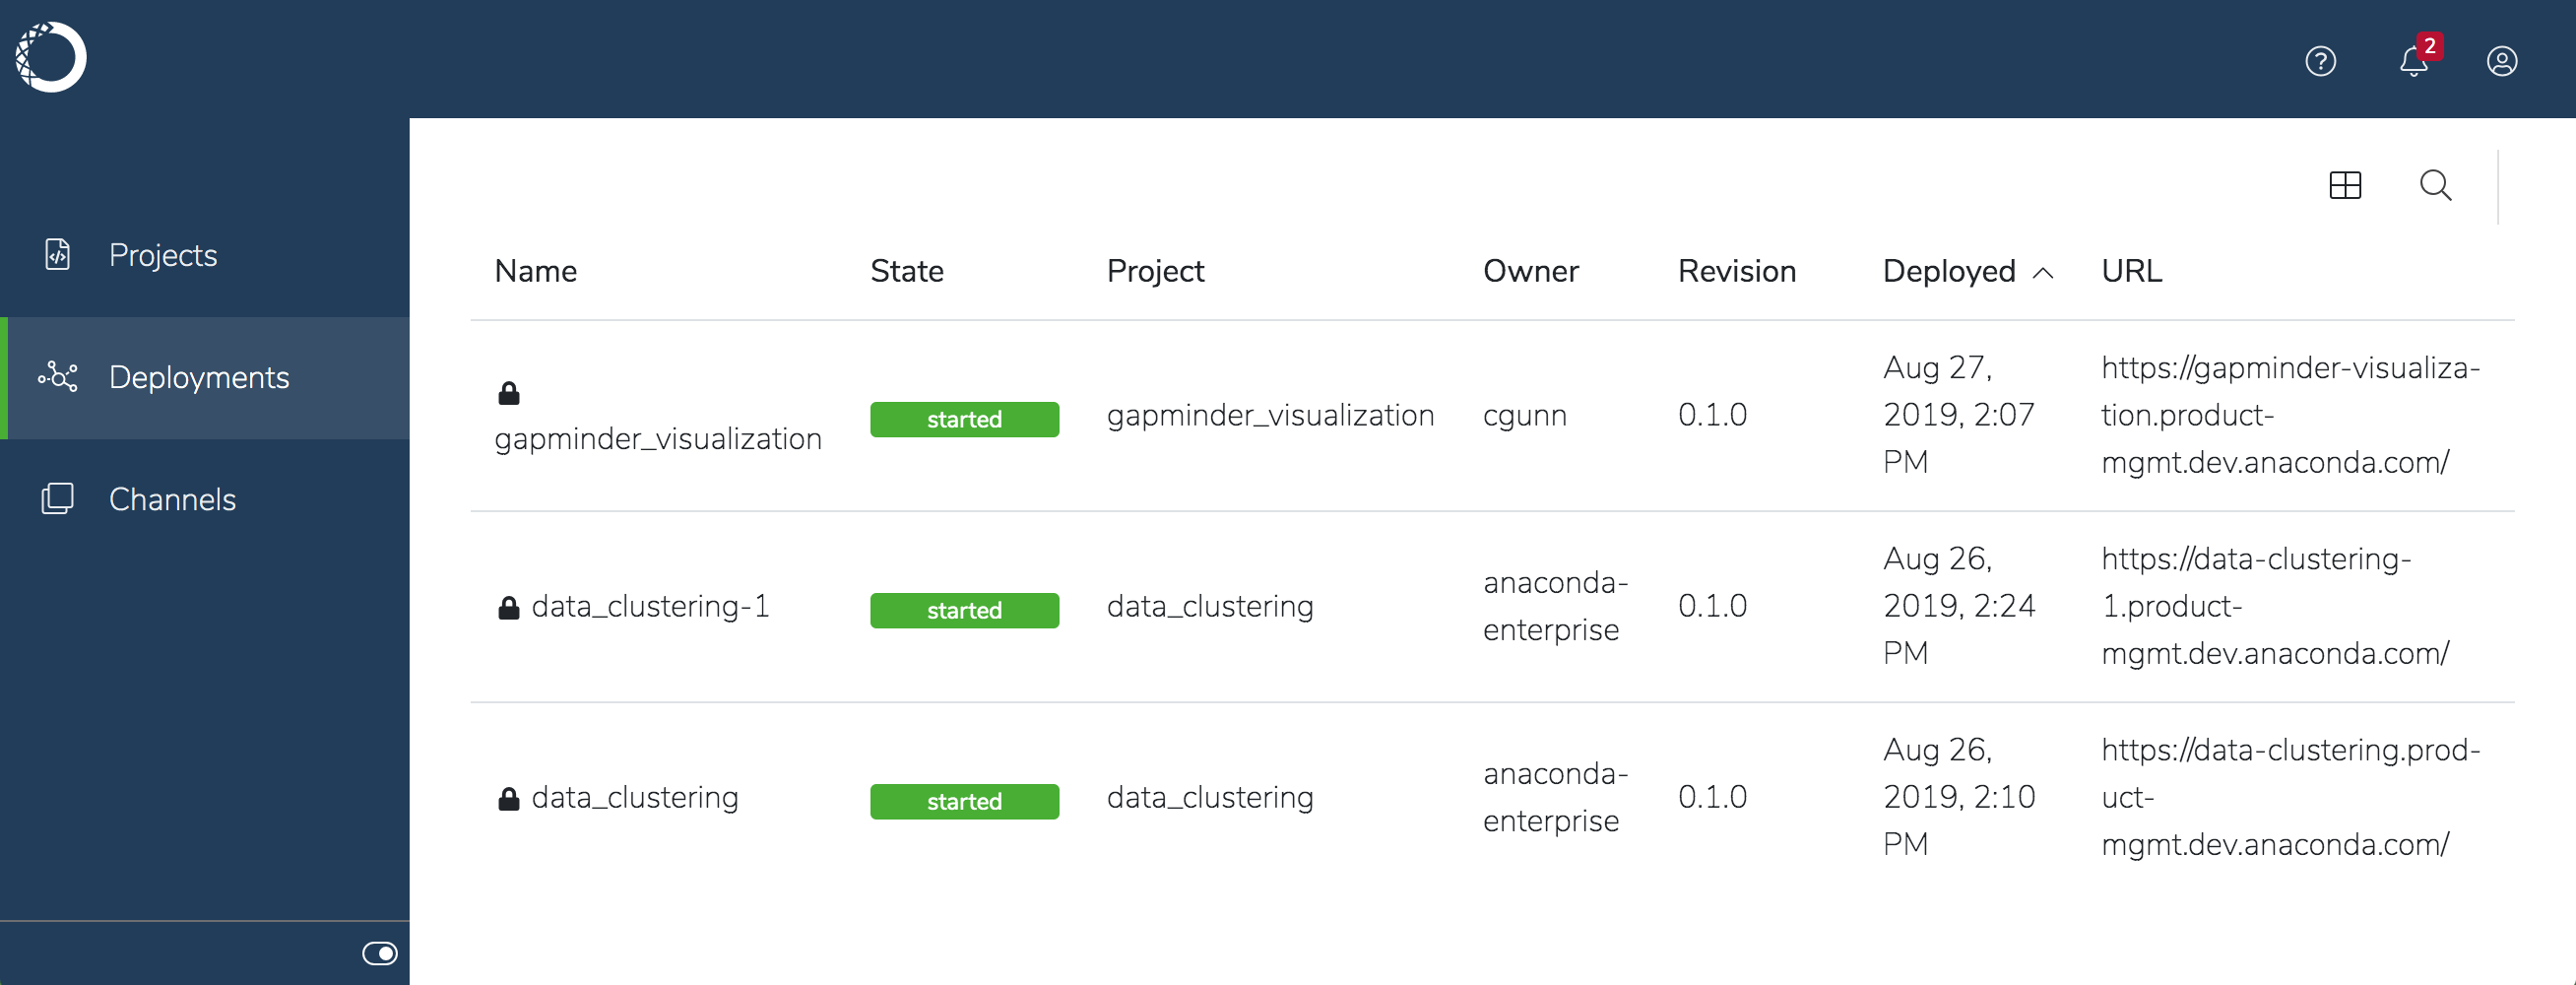
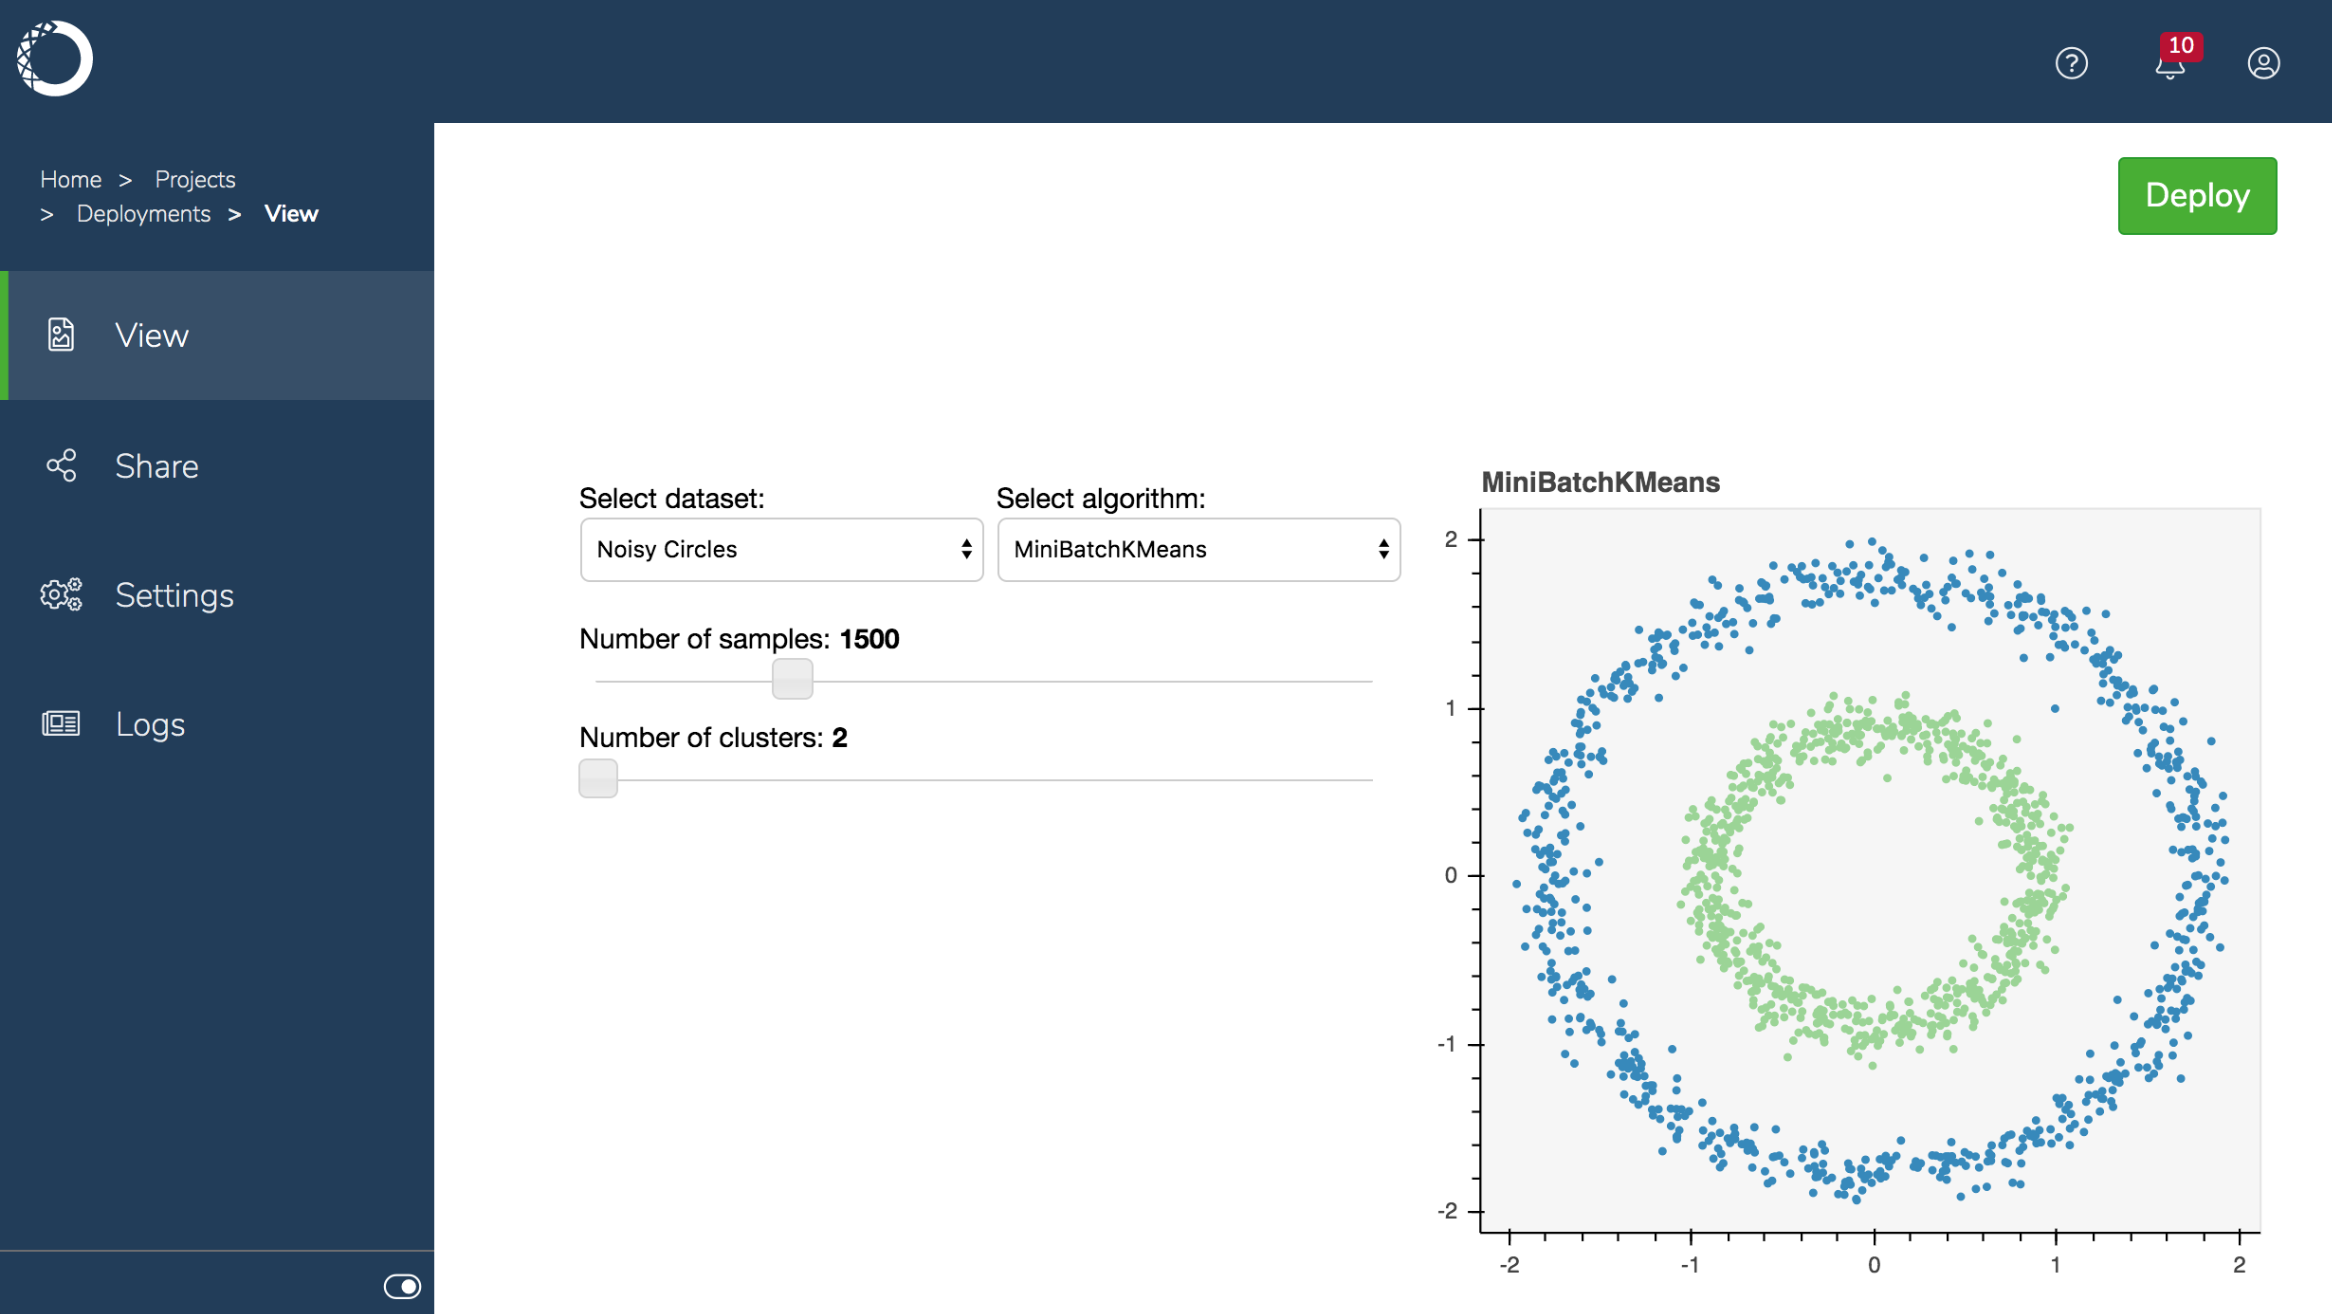
To view or interact with a deployment, click its name in the list.
You can also schedule a project to be deployed on a regular basis or at a specific time.