Updating TLS/SSL certificates
You can replace the self-signed certificates generated as part of the initial post-install configuration at any time.
To minimize downtime, make sure that you have completed the preparation steps below before scheduling a maintenance interval to update the certificates. When you are ready, you can update the certificates using either the admin console or the command line. We strongly recommend the use of the admin console to minimize the potential for error.
Users should be asked to save their work and log out before updating the certificates. While sessions, deployments, and jobs will still continue to function properly, there will be a brief interruption of front-end service during the update process.
Preparing for the update
You will need the following information and files to proceed. If using the admin console, you will need the files present in a location where you can cut and paste their contents into the UI. If you are updating the certificates from the command line, the files themselves will need to be copied to the server.
Most installations will need the following items:
The registered domain name of the server, referred to by
<FQDN>below.The public SSL certificate for the domain
<FQDN>:tls.crtThe private SSL key for the domain
<FQDN>:tls.key.If applicable, the intermediate certificate bundle:
intermediate.pem.If your certificate was issued by a private root CA, the public certificate for that CA:
rootca.crt.
If you are using LetsEncrypt, the filenames will be different:
The public SSL certificate:
cert.pemThe private SSL key for the domain:
privkey.pem.The intermediate certificate bundle:
chain.pem.No root CA file is needed in this case.
If you are using a different domain and/or SSL certificate for the session/deployment subdomains, you will need this additional information:
The wildcard subdomain. We will refer to this as
<DEPLOYMENT-FQDN>below.The public SSL certificate for
*.<DEPLOYMENT-FQDN>:wildcard.crtThe private SSL key for
*.<DEPLOYMENT-FQDN>:wildcard.key
Note that AE5 assumes that the intermediate certificate and root CA, if applicable, are identical for both certificates.
Finally, if you intend to use the command-line approach to updating the certificates, you will need a copy of the the latest set of publicly trusted root certificates:
The most up-to-date version of this set can be obtained from this URL:
https://curl.se/ca/cacert.pemA copy of this file, current to when AE5 installer package was built, can be found at
DIY-SSL-CA/CA/pubCA.crtin your unpacked installer assets.
Using the admin console
Log in to Anaconda Enterprise using an account that has been given the
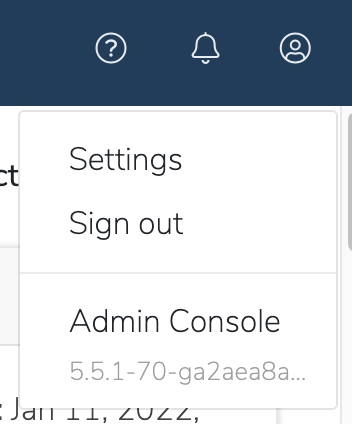
ae-adminrole. Theanaconda-enterpriseaccount has this role by default, for instance.Select the menu icon in the top right-hand corner of the window, and select Admin Console.
Select Web Certificates from the left-hand menu.
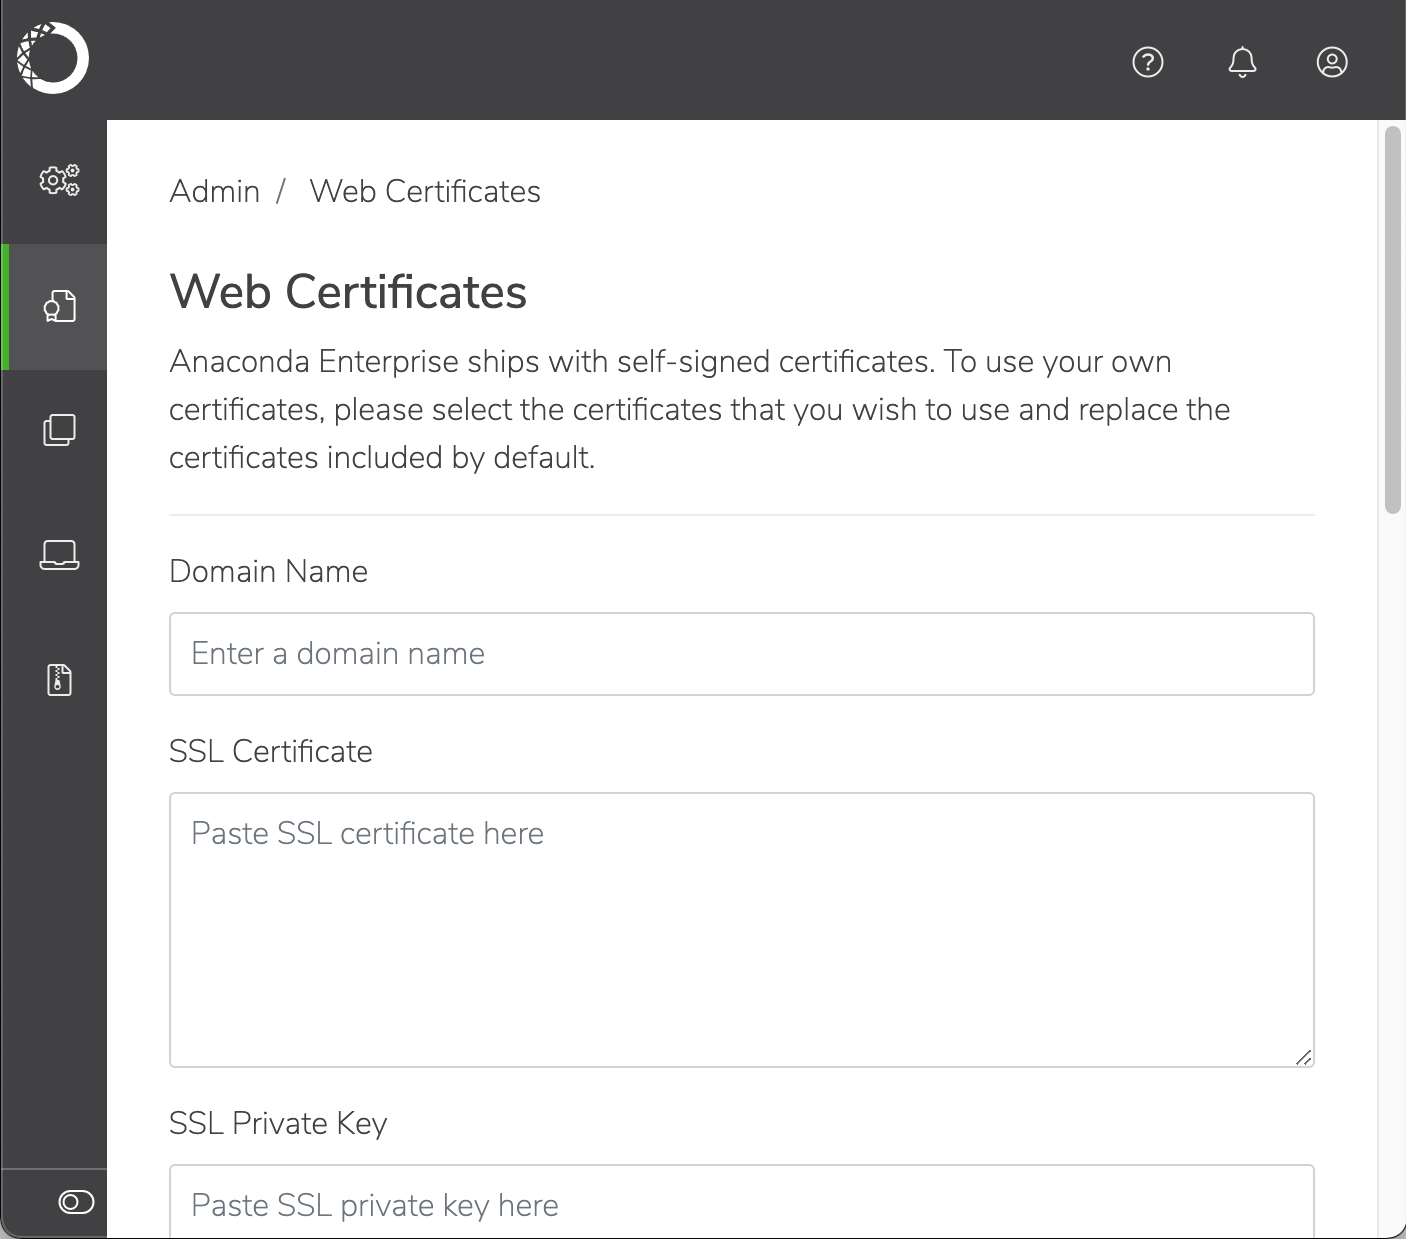
Copy and paste the certificate and key information from the files you gathered previously into the appropriate fields. Make sure to paste the content of each file into the appropriate box, not the filenames.
Domain name:
<FQDN>SSL Certificate:
tls.crt/cert.pemSSL Private Key:
tls.key/privkey.pemRoot Certificate:
rootca.crt, if applicableIntermediate Certificate:
intermediate.pem/chain.pem, if applicableWildcard Domain:
<DEPLOYMENT-FQDN>, or<FQDN>if identical. Do not include an asterisk.Wildcard Certificate:
wildcard.crtif different;tls.crt/cert.pemif identical.Wildcard Private Key:
wildcard.keyif different;tls.key/privkey.pemif identical.
Click Save to update the platform with your changes.
If your root CA has changed, you will need to restart the Anaconda Enterprise system pods to make sure that the pods that use this certificate will pick up the new copy.
Using the command line
Log onto a node with
kubectlaccess to the cluster (e.g., the master node), and make sure all of the files mentioned above have been transferred there, including the root CA trust filecacert.pem. For convenience, here is a simple command to download the latest version of that file:Make sure you have downloaded a copy of
cacert.pemper the instructions above. If you have a private root CA, append it to that file:If you have an intermediate bundle, you will need a file that combines that bundle with your main public certificate:
If you are using LetsEncrypt, you may skip this step, as
fullchain.pemhas already been provided for you.Set up the basic structure of the
certificates.yamlfile, that you’ll be updating in the next several stepsFor each entry in the certificate set, we need to replace its placeholder with a base-64 encoded version of the correct data. We offer several different versions of this step here for different scenarios, but make sure to substitute any filename differences you may have before proceeding.
For the simple case of a single certificate with an intermediate, do as follows:
If you are using a LetsEncrypt certificate, the second filename is
privkey.peminstead:If you have separate certificates for the main and wildcard domains, the command will look something like this:
Take a quick look at the file to ensure that all of the substitutions were made successfully. One simple approach is to run this
grepcommand; if all of the substitutions have been made, it should return nothing:Back up your existing secrets for safety:
Remove the existing secrets, and recreate them from the new file:
On Gravity clusters, you will also need to add these secrets to the kube-system namespace:
Restart all of the Anaconda Enterprise system pods. This is to make sure that the pods that require the root certificate will pick up the new copy.