Keycloak Upgrade#
With the release of Anaconda Enterprise 5.6, significant improvements have been made to our Keycloak implementation. For details, please see the release notes.
Upgrading to Anaconda Enterprise 5.6 requires Keycloak configuration changes to access your instance. You’ll need to add a service account with correct permissions to the anaconda-platform client, then add a protocol mapper to the roles client scope.
Enabling the service account#
After your upgrade to Anaconda Enterprise 5.6+ completes:
Open a browser and log in to your Keycloak admin panel using your existing Keycloak credentials. Your Keycloak admin panel can be found at
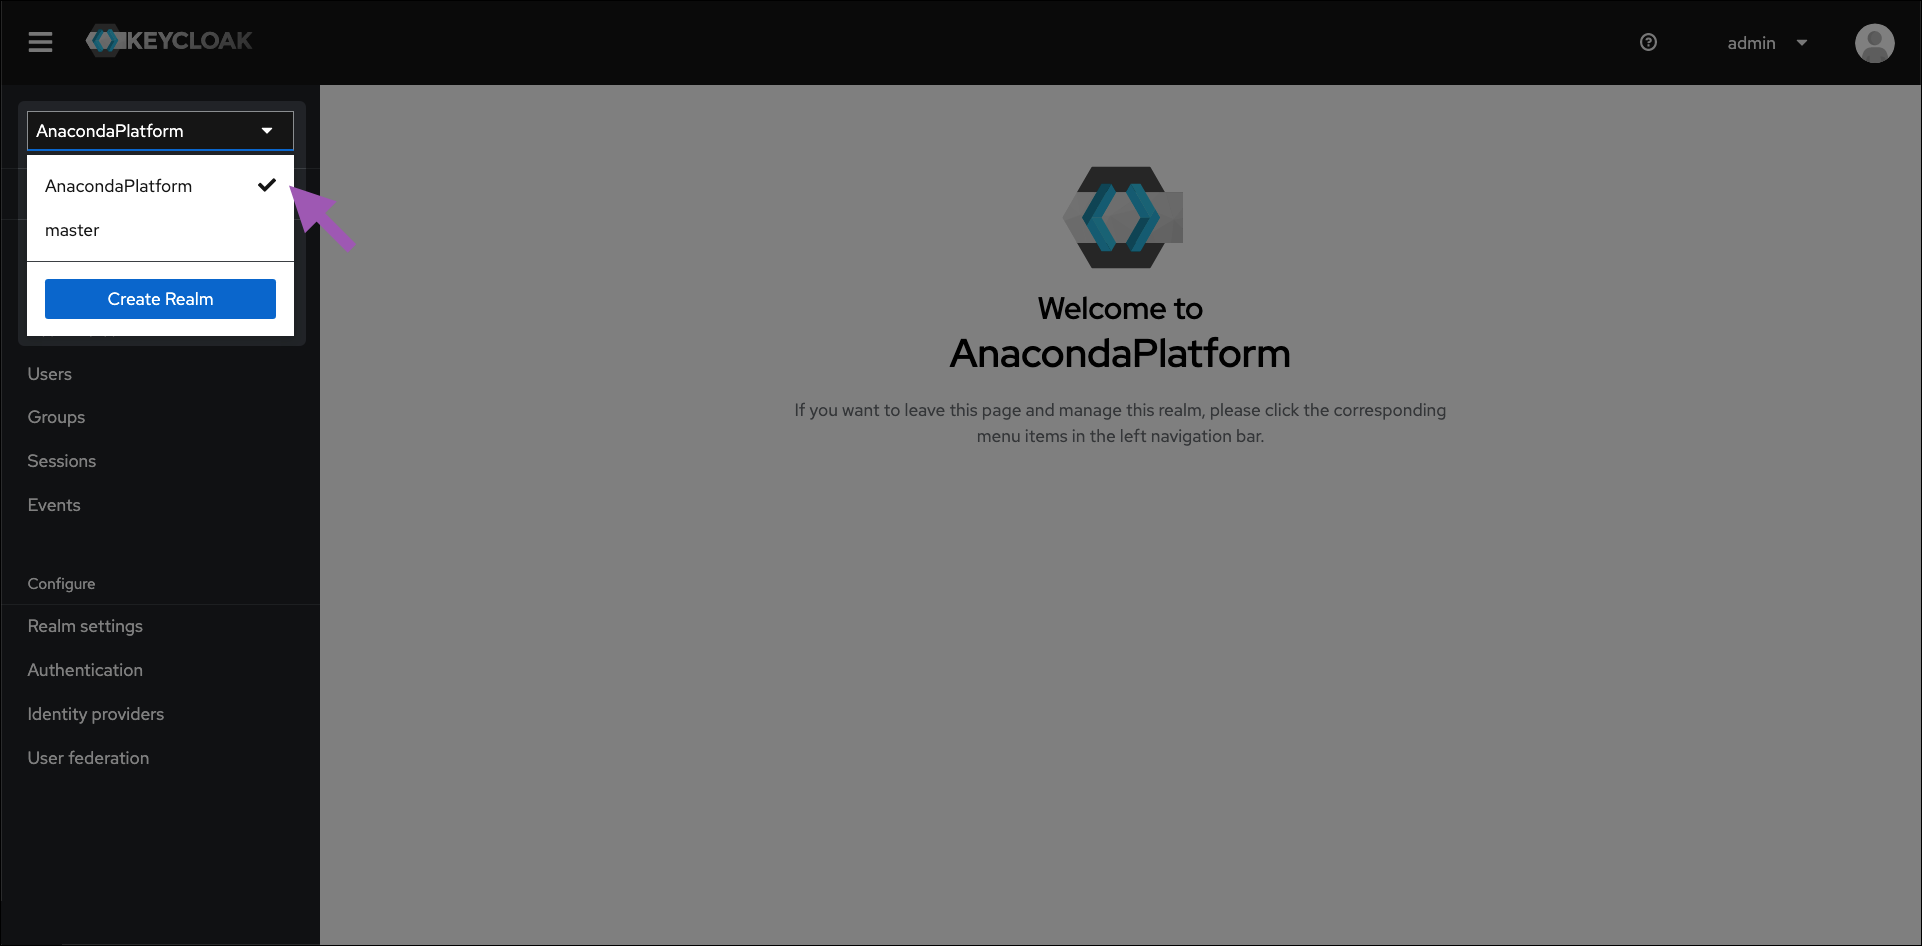
https://<FQDN>auth/adminwhere<FQDN>is your Anaconda Enterprise fully qualified domain name.Verify you are on the anaconda-platform realm.
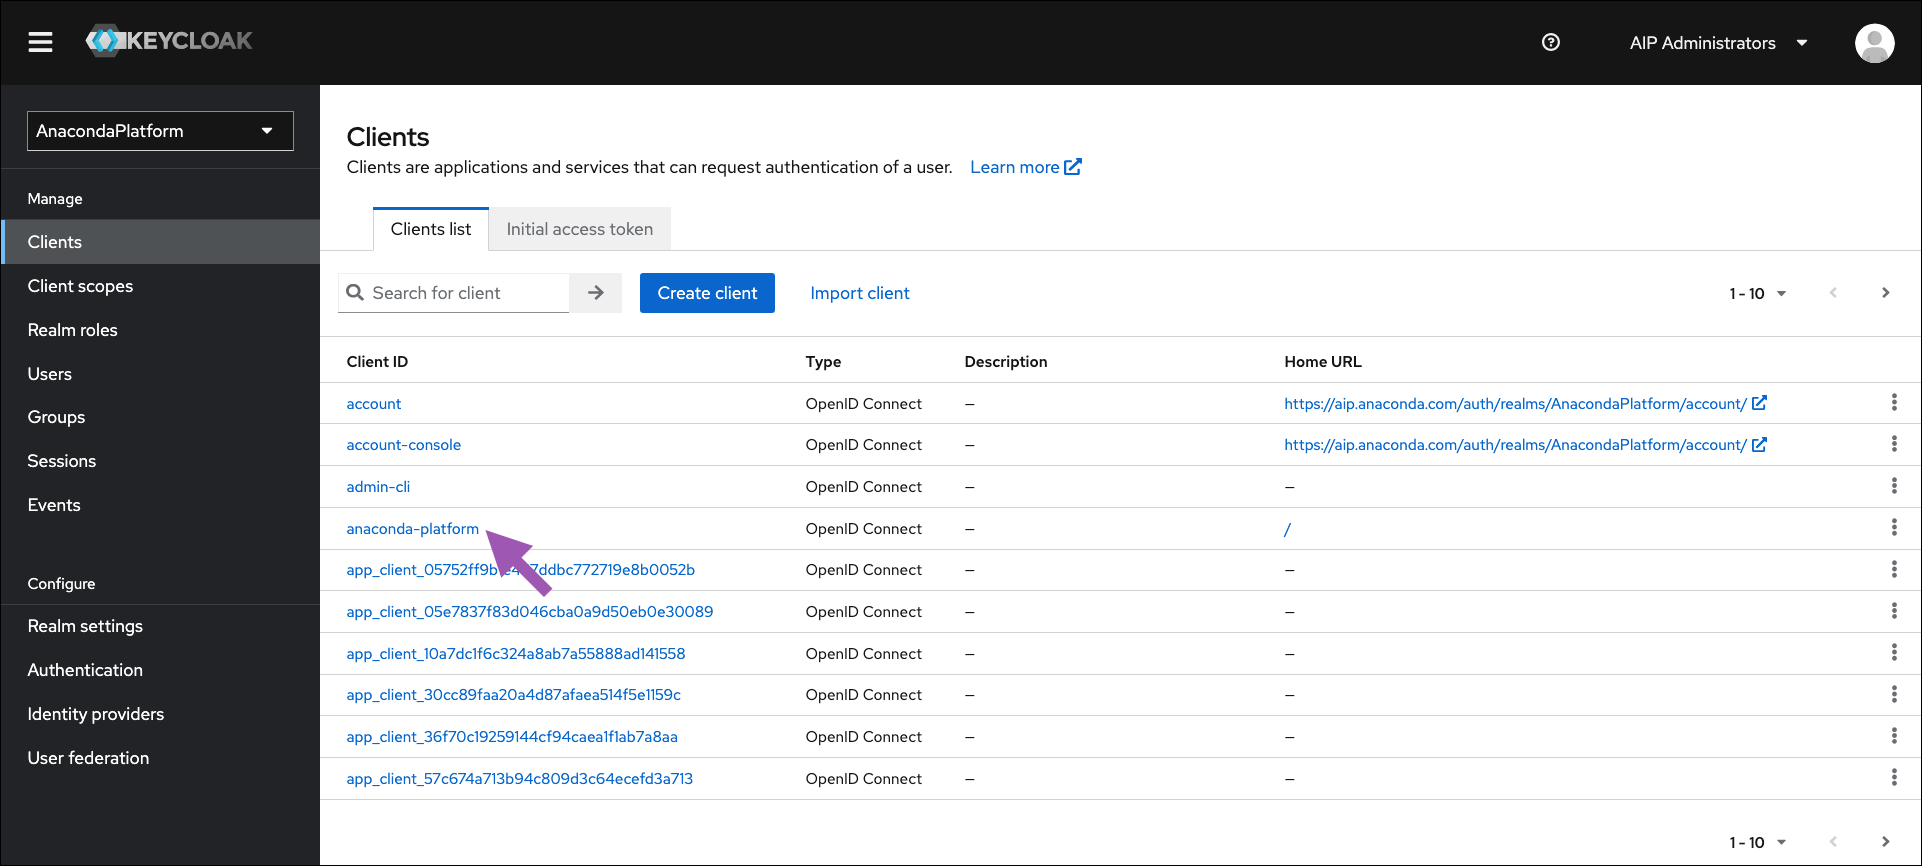
Select Clients from the left-hand navigation, then select anaconda-platform from the list of available clients.
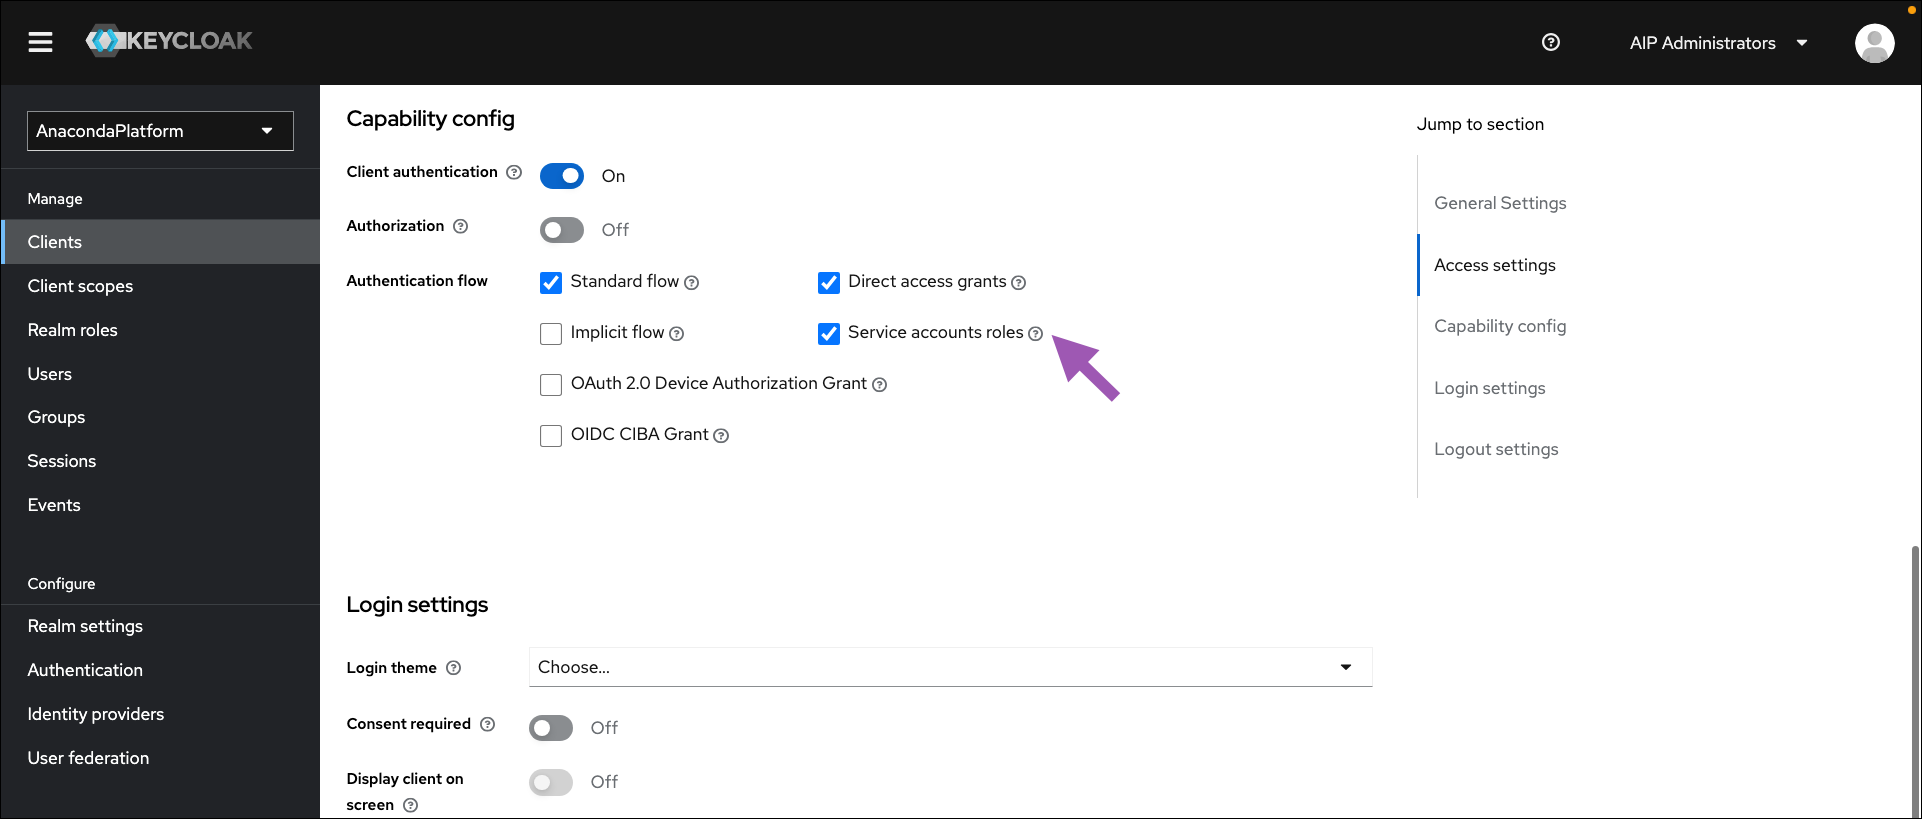
Select the Service accounts roles checkbox under Capability config, then save your changes.
Select the new Service accounts roles tab that appears at the top of the page.
Click Assign role.

Open the filter dropdown menu and select Filter by clients.
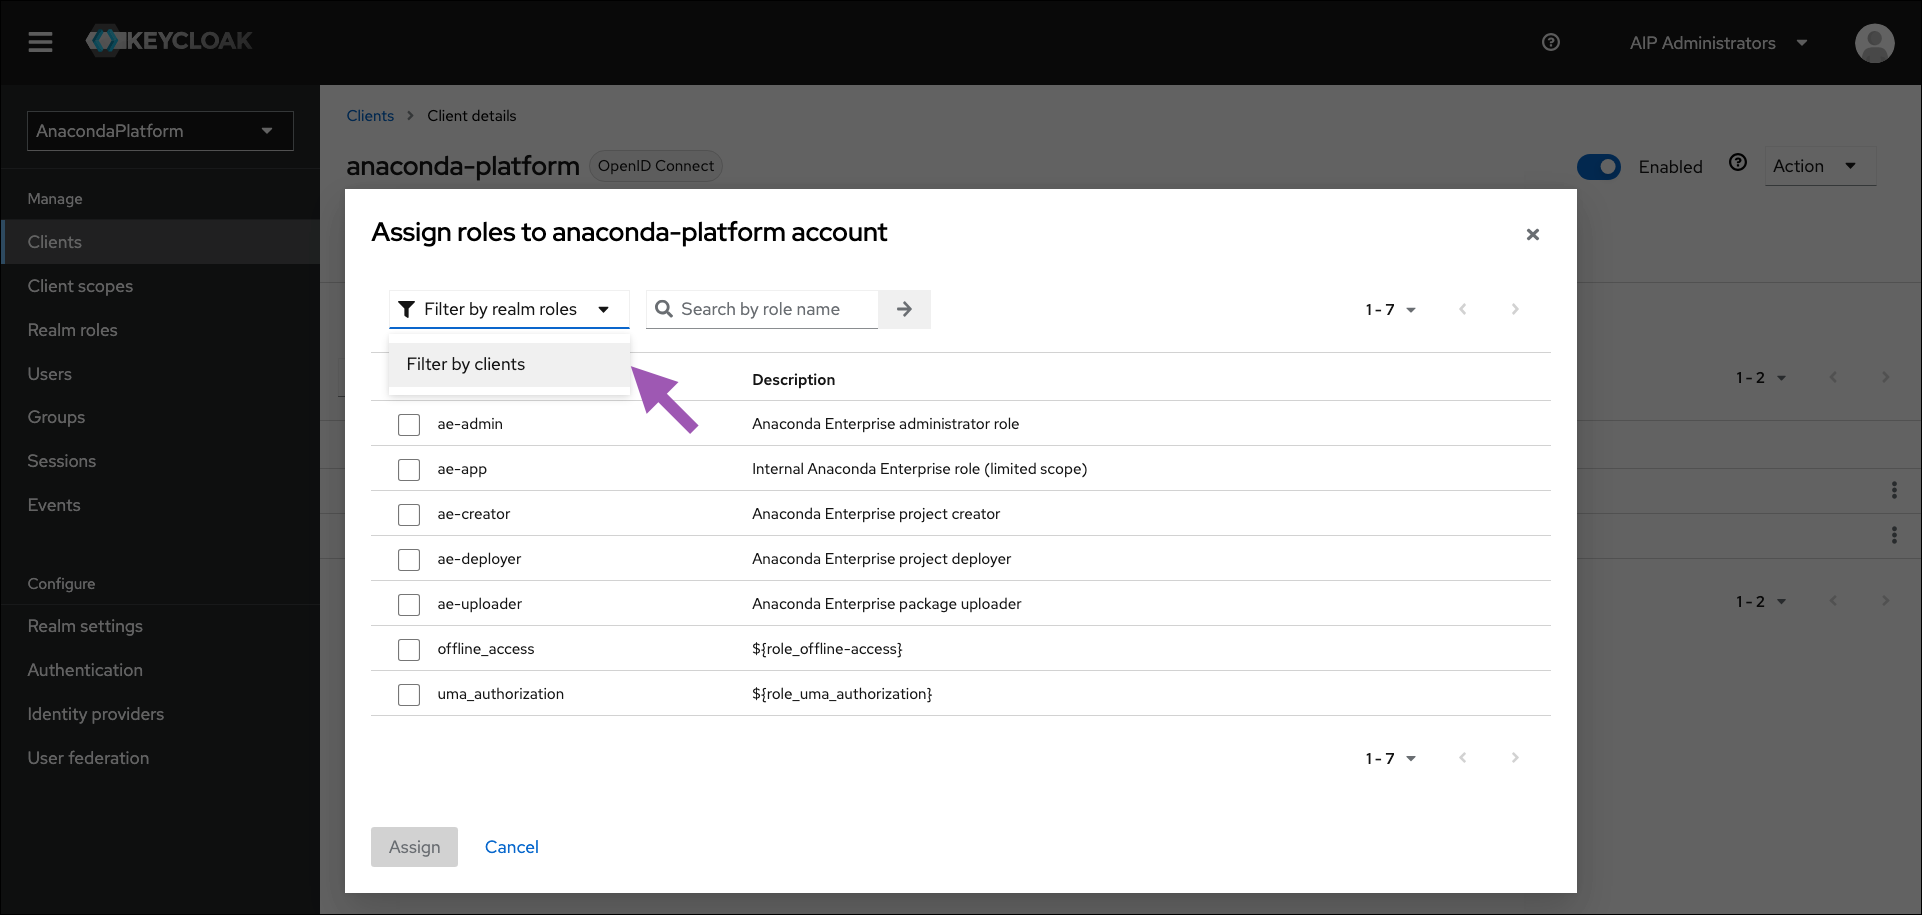
Search for the
view-usersrole.Select the role, then click Assign.

Adding the protocol mapper#
Select Client scopes from the left-hand navigation, then select roles from the list of available client scopes.
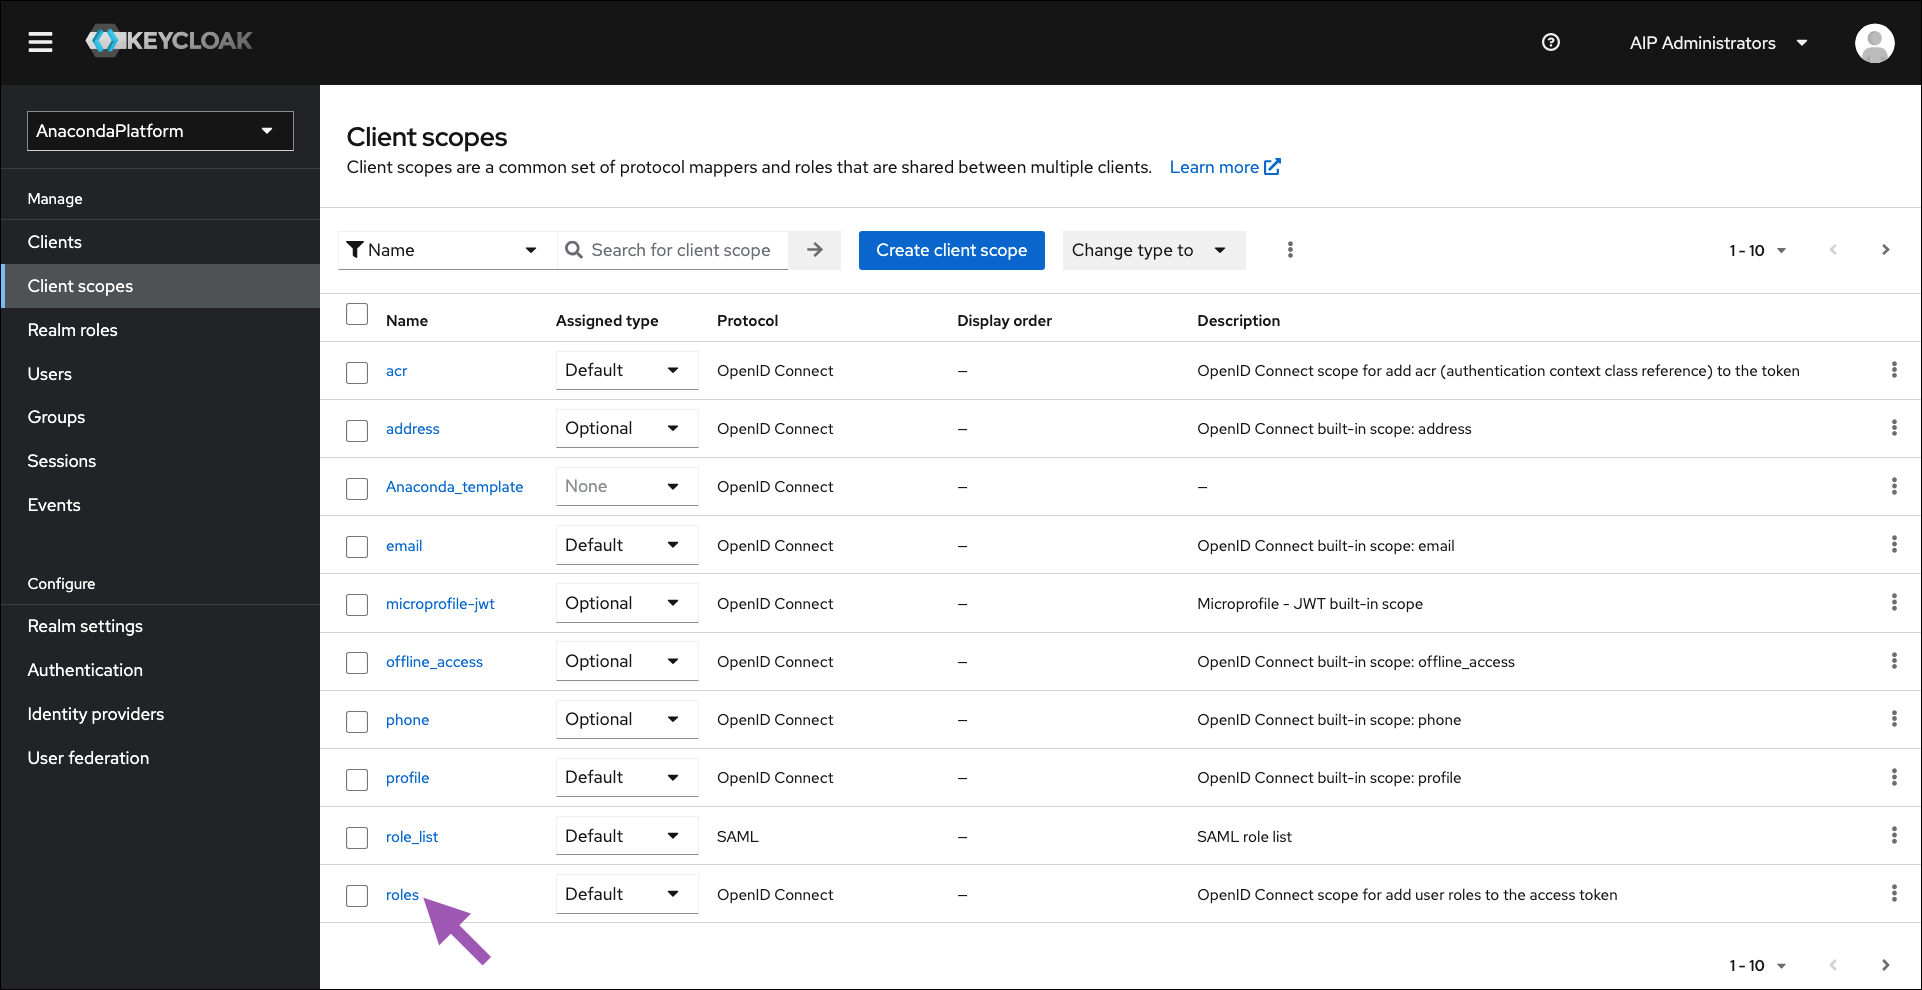
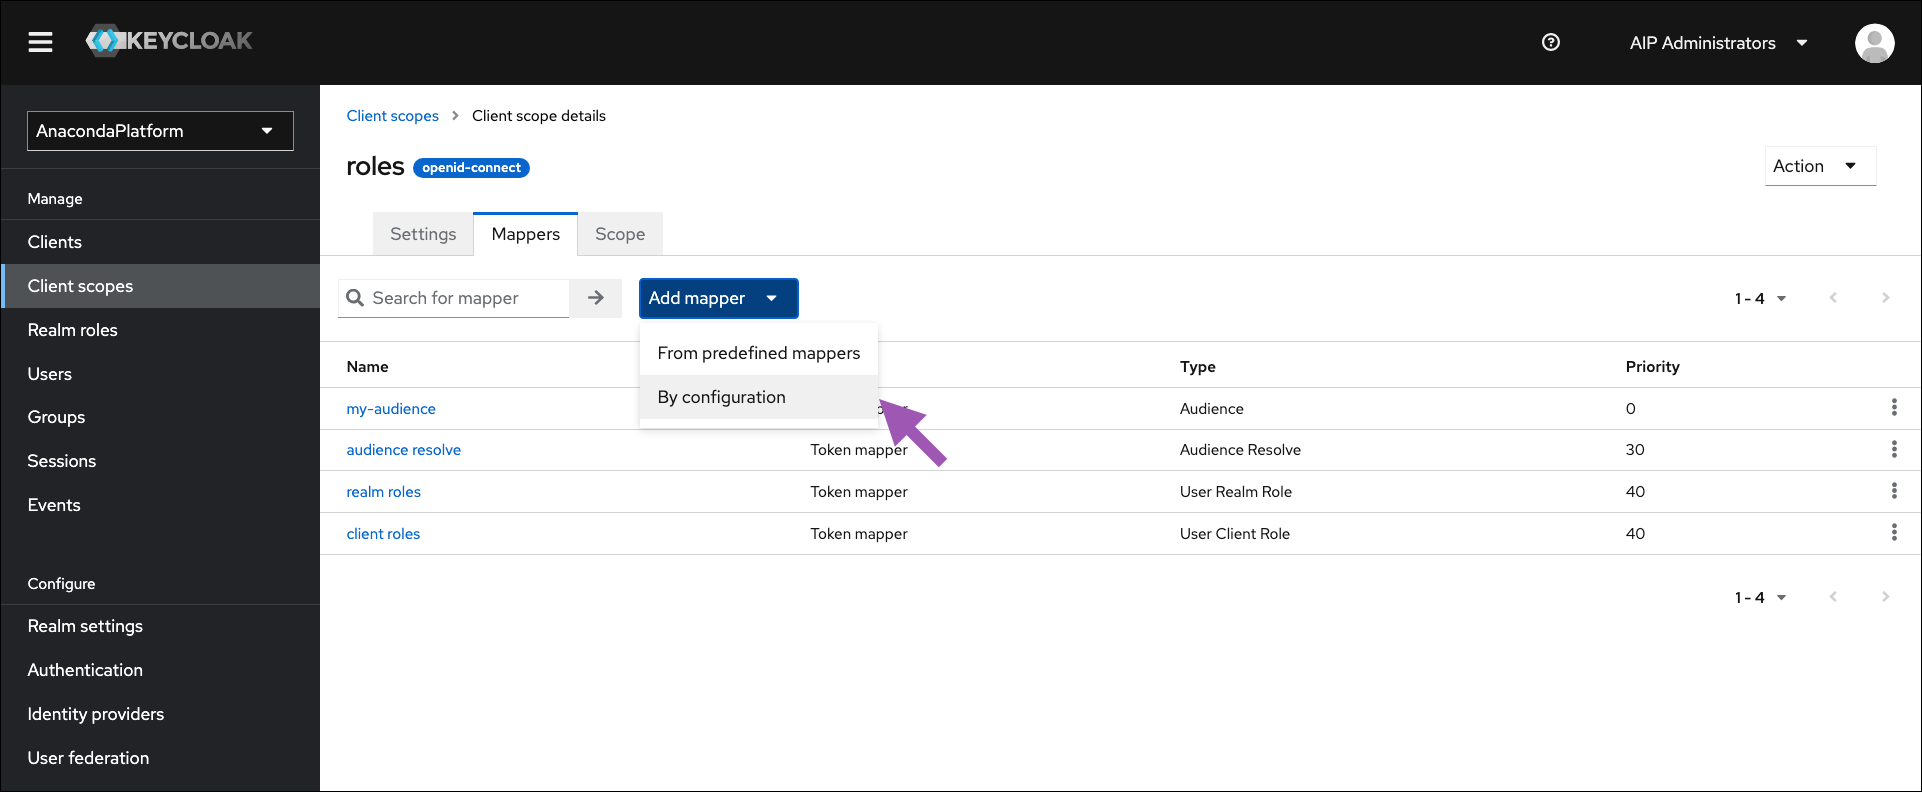
Select the Mappers tab.
Open the Add mapper dropdown menu and select By configuration.
Select Audience.
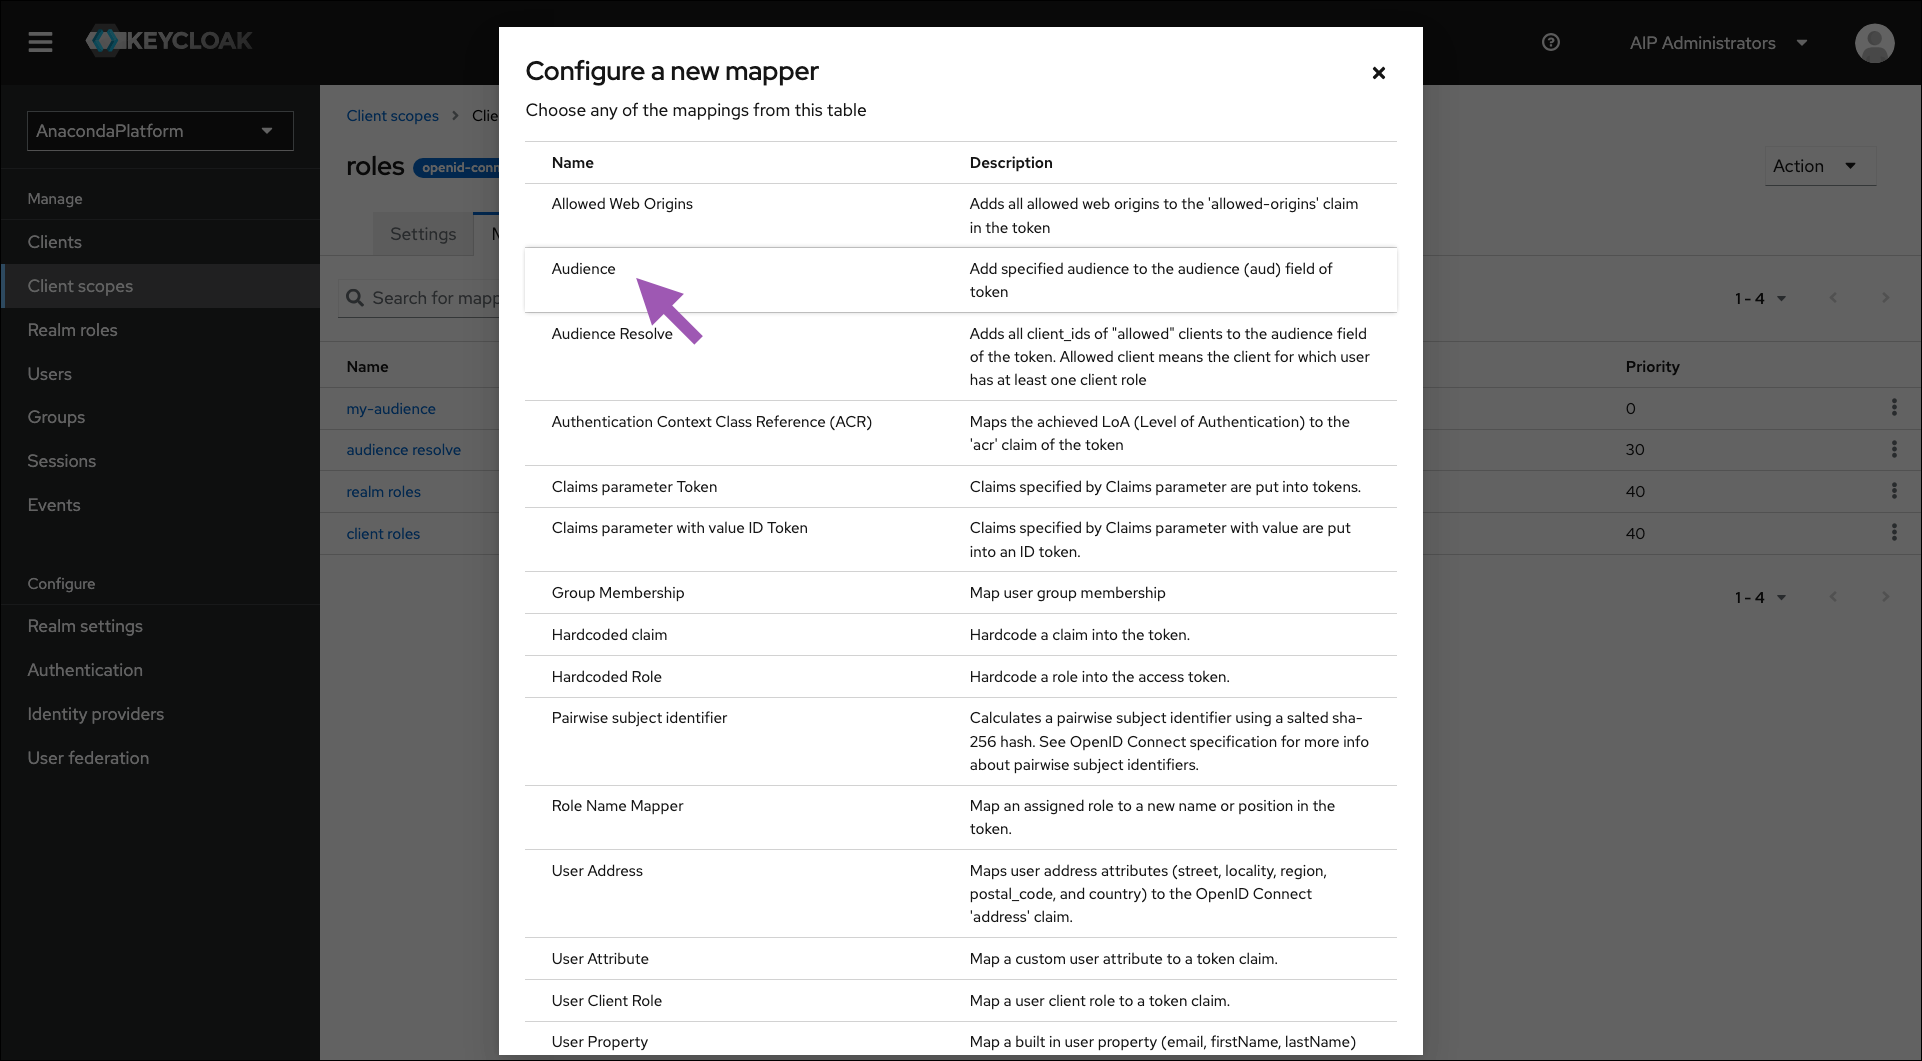
Complete the fields and set the toggle switches as indicated:
Name - my-audience
Included Client Audience - anaconda-platform
Add to ID token -
ONAdd to access token -
ON
Click Save.

Success! You can now log in to your instance from an existing account and use AE5 normally.