Connecting to external identity providers#
Data Science & AI Workbench comes with out-of-the-box support for LDAP, Active Directory, SAML and Kerberos. As each enterprise configuration is different, coordinate with your LDAP/AD Administrator to obtain the provider-specific information you need to proceed. We’ve also provided an example of an LDAP setup to help guide you through the process.
Note
You must have pagination turned off before starting.
Adding a provider#
You’ll use the Administrative Console’s Authentication Center to add an identity provider:
Open the My Account dropdown menu and select Admin Console.
Select Manage Users to access the Keycloak user interface (UI).
Log in using your Keycloak admin account credentials.
Select User Federation from the left-hand navigation.
Select
ldapfrom the Add provider selector to display the initial Required Settings screen.
Multiple fields are required. The most important is the Vendor drop-down list, which will prefill default settings based on the LDAP provider you select. Make sure you select the correct one:
Active DirectoryRed Hat Directory ServerTivoliNovell eDirectory
If none of these match your LDAP provider, select Other and coordinate with your LDAP Administrator to provide values for the required fields:
- Username LDAP attribute
Name of the LDAP attribute that will be mapped to the username. Active Directory installations may use
cnorsAMAccountName. Others often useuid.- RDN LDAP attribute
Name of the LDAP attribute that will be used as the RDN for a typical user DN lookup. This is often the same as the above “Username LDAP attribute”, but does not have to be. For example, Active Directory installations may use
cnfor this attribute while usingsAMAccountNamefor the “Username LDAP attribute”.- UUID LDAP attribute
Name of an LDAP attribute that will be unique across all users in the tree. For example, Active Directory installations should use
objectGUID. Other LDAP vendors typically define a UUID attribute, but if your implementation does not have one, any other unique attribute (such asuidorentryDN) may be used.- User Object Classes
Values of the LDAP
objectClassattribute for users, separated by a comma. This is used in the search term for looking up existing LDAP users, and if read-write sync is enabled, new users will be added to LDAP with theseobjectClassvalues as well.- Connection URL
The URL used to connect to your LDAP server. Click Test connection to make sure your connection to the LDAP server is configured correctly.
- Users DN
The full DN of the LDAP tree–the parent of LDAP users. For example,
'ou=users,dc=example,dc=com'.- Authentication Type
The LDAP authentication mechanism to use. The default is
simple, which requires the Bind DN and password of the LDAP Admin.- Bind DN
The DN of the LDAP Admin, required to access the LDAP server.
- Bind Credential
The password of the LDAP Admin, required to access the LDAP server. After supplying the DN and password, click Test authentication to confirm that your connection to the LDAP server can be authenticated.
Configuring sync settings#
By default, users will not be synced from the LDAP / Active Directory store until they log in. If you have a large number of users to import, it can be helpful to set up batch syncing and periodic updates.

Configuring mappers#
After you complete the initial setup, the auth system generates a set of “mappers” for your configuration. Each mapper takes a value from LDAP and maps it to a value in the internal auth database.
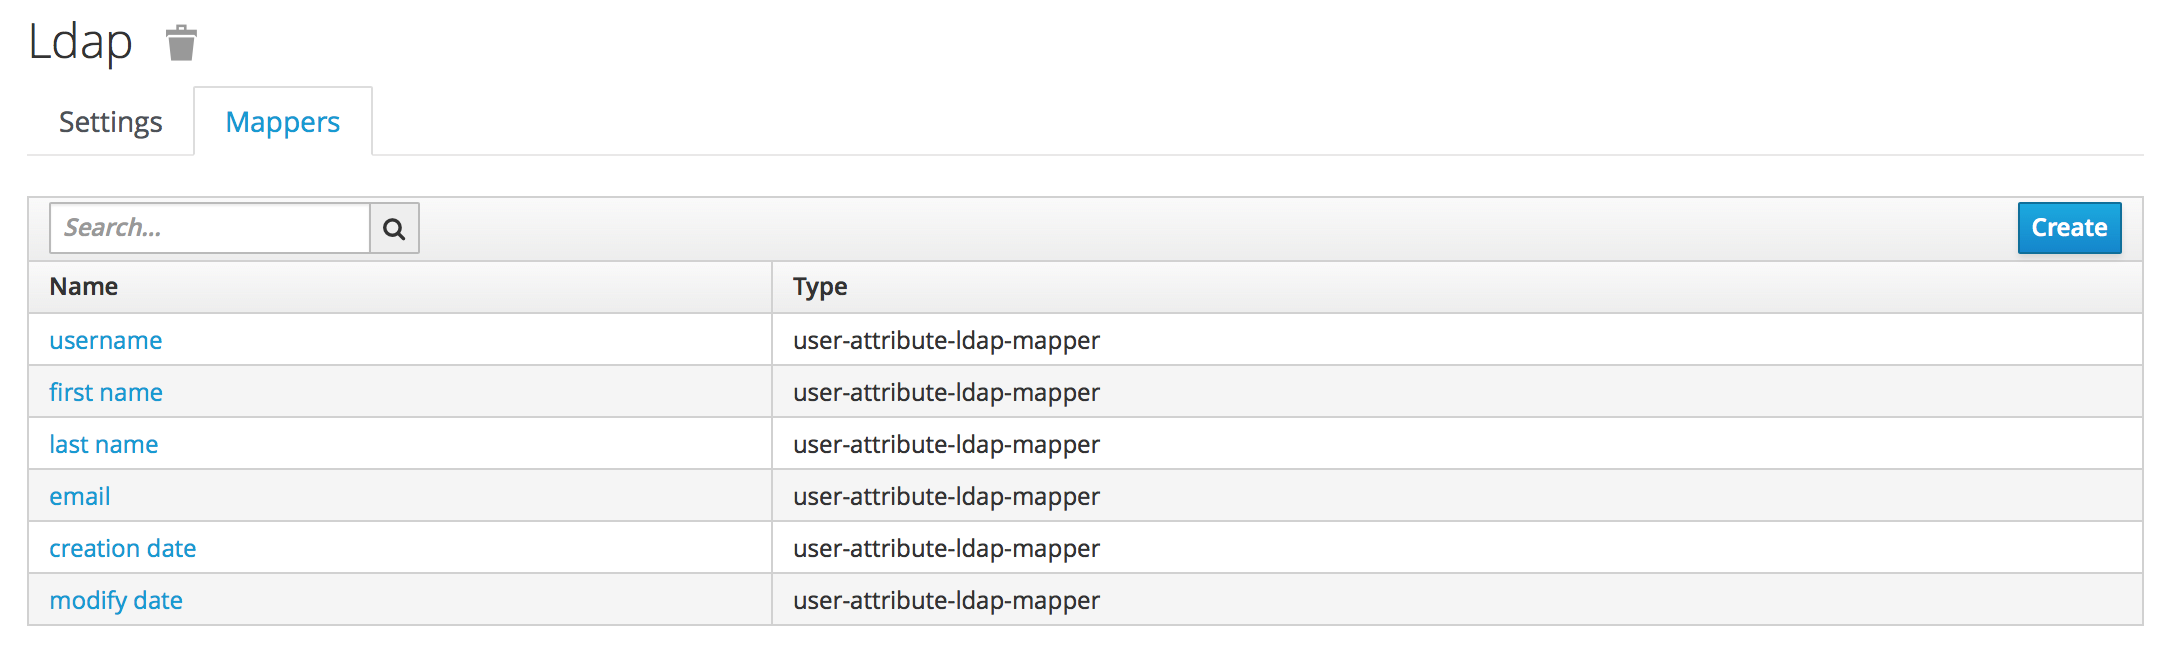
Go through each mapper and make sure it is set up appropriately.
Check that each mapper reads the correct “LDAP attribute” and maps it to the right “User Model Attribute”.
Check that the attribute’s “read-only” setting is correct.
Check whether the attribute should always be read from the LDAP store and not from the internal database.
For example, the username mapper sets the Workbench username from the LDAP attribute
configured.

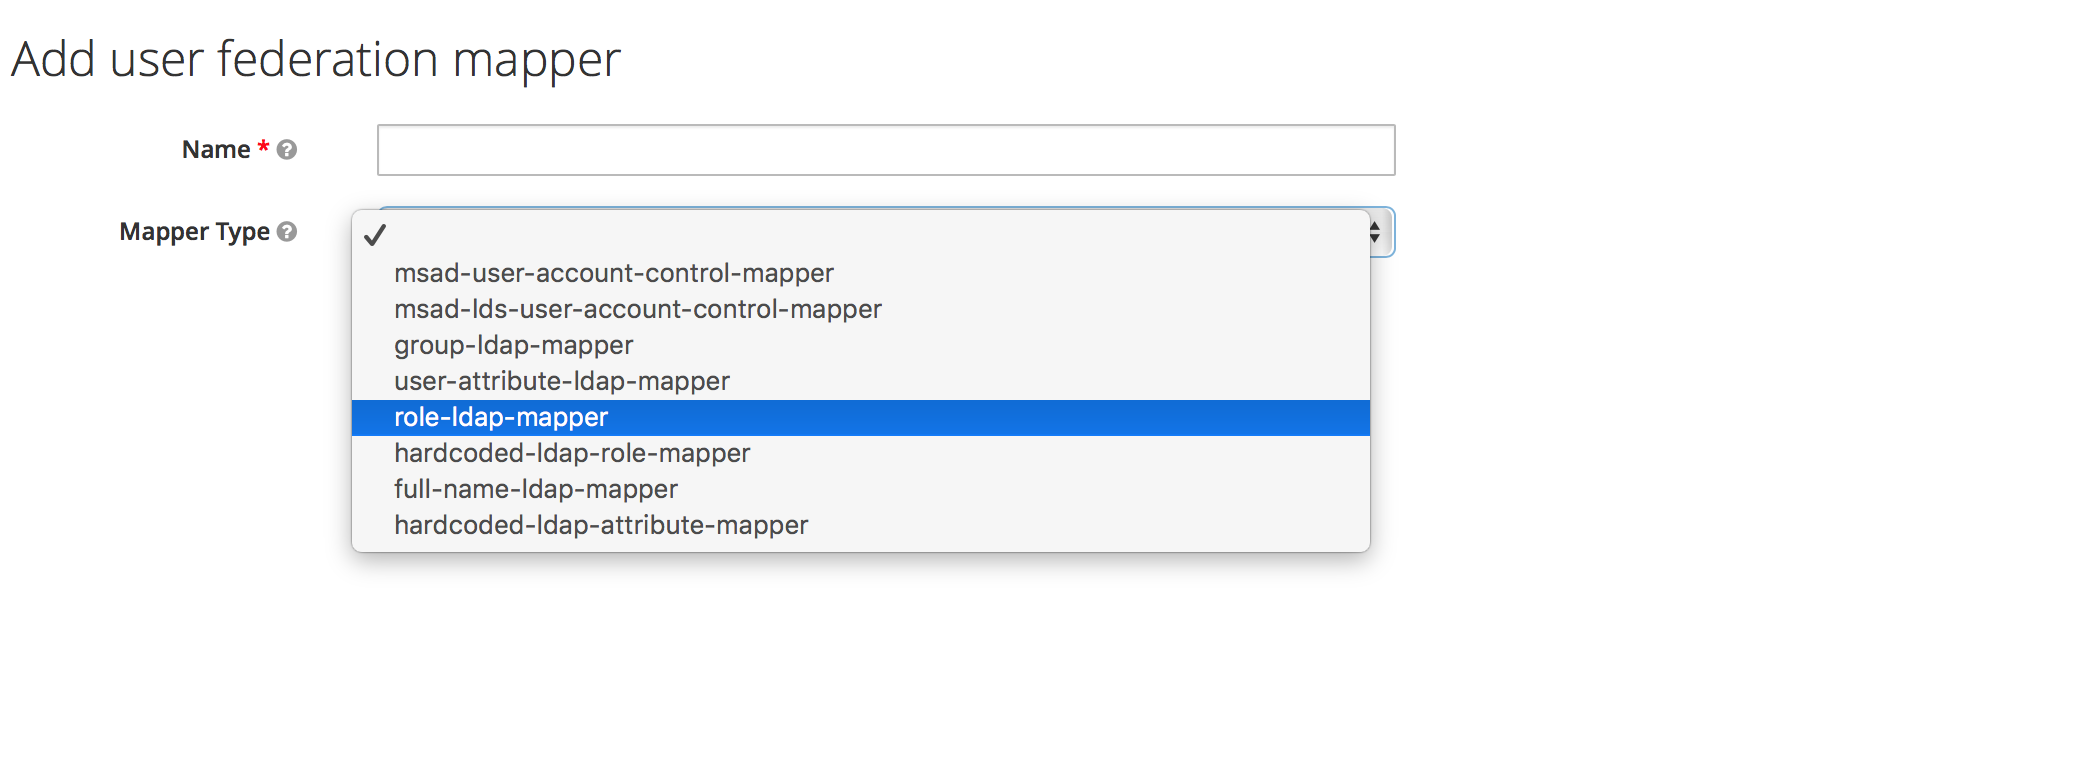
Configuring advanced mappers#
Instead of manually configuring each user, you can automatically import user data from LDAP using additional mappers. The following mappers are available:
- User Attribute Mapper (
user-attribute-ldap-mapper) Maps LDAP attributes to attributes on the Workbench user. These are the default mappers set up in the initial configuration.
- FullName Mapper (
full-name-ldap-mapper) Maps the full name of the user from LDAP into the internal database.
- Role Mapper (
role-ldap-mapper) Sets role mappings from LDAP into realm role mappings. One role mapper can be used to map LDAP roles (usually groups from a particular branch of an LDAP tree) into realm roles with corresponding names.
Multiple role mappers can be configured for the same provider. It’s possible to map roles to a particular client (such as the
anaconda-deployservice), but it’s usually best to map in realm-wide roles.- Hardcoded Role Mapper (
hardcoded-ldap-role-mapper) Grants a specified role to each user linked with LDAP.
- Hardcoded Attribute Mapper (
hardcoded-ldap-attribute-mapper) Sets a specified attribute to each user linked with LDAP.
- Group Mapper (
group-ldap-mapper) Sets group mappings from LDAP. Can map LDAP groups from a branch of an LDAP tree into groups in the Anaconda Platform realm. It will also propagate user-group membership from LDAP. We generally recommend using roles and not groups, so the role mapper may be more useful.
Warning
The group mapper provides a setting Drop non-existing groups during sync. If this setting is turned on, existing groups in Workbench Authentication Center will be erased.
- MSAD User Account Mapper (
msad-user-account-control-mapper) Microsoft Active Directory (MSAD) specific mapper. Can tightly integrate the MSAD user account state into the platform account state, including whether the account is enabled, whether the password is expired, and so on. Uses the
userAccountControlandpwdLastSetLDAP attributes.For example if
pwdLastSetis0, the user is required to update their password and there will be anUPDATE_PASSWORDrequired action added to the user. IfuserAccountControlis514(disabled account), the platform user is also disabled.
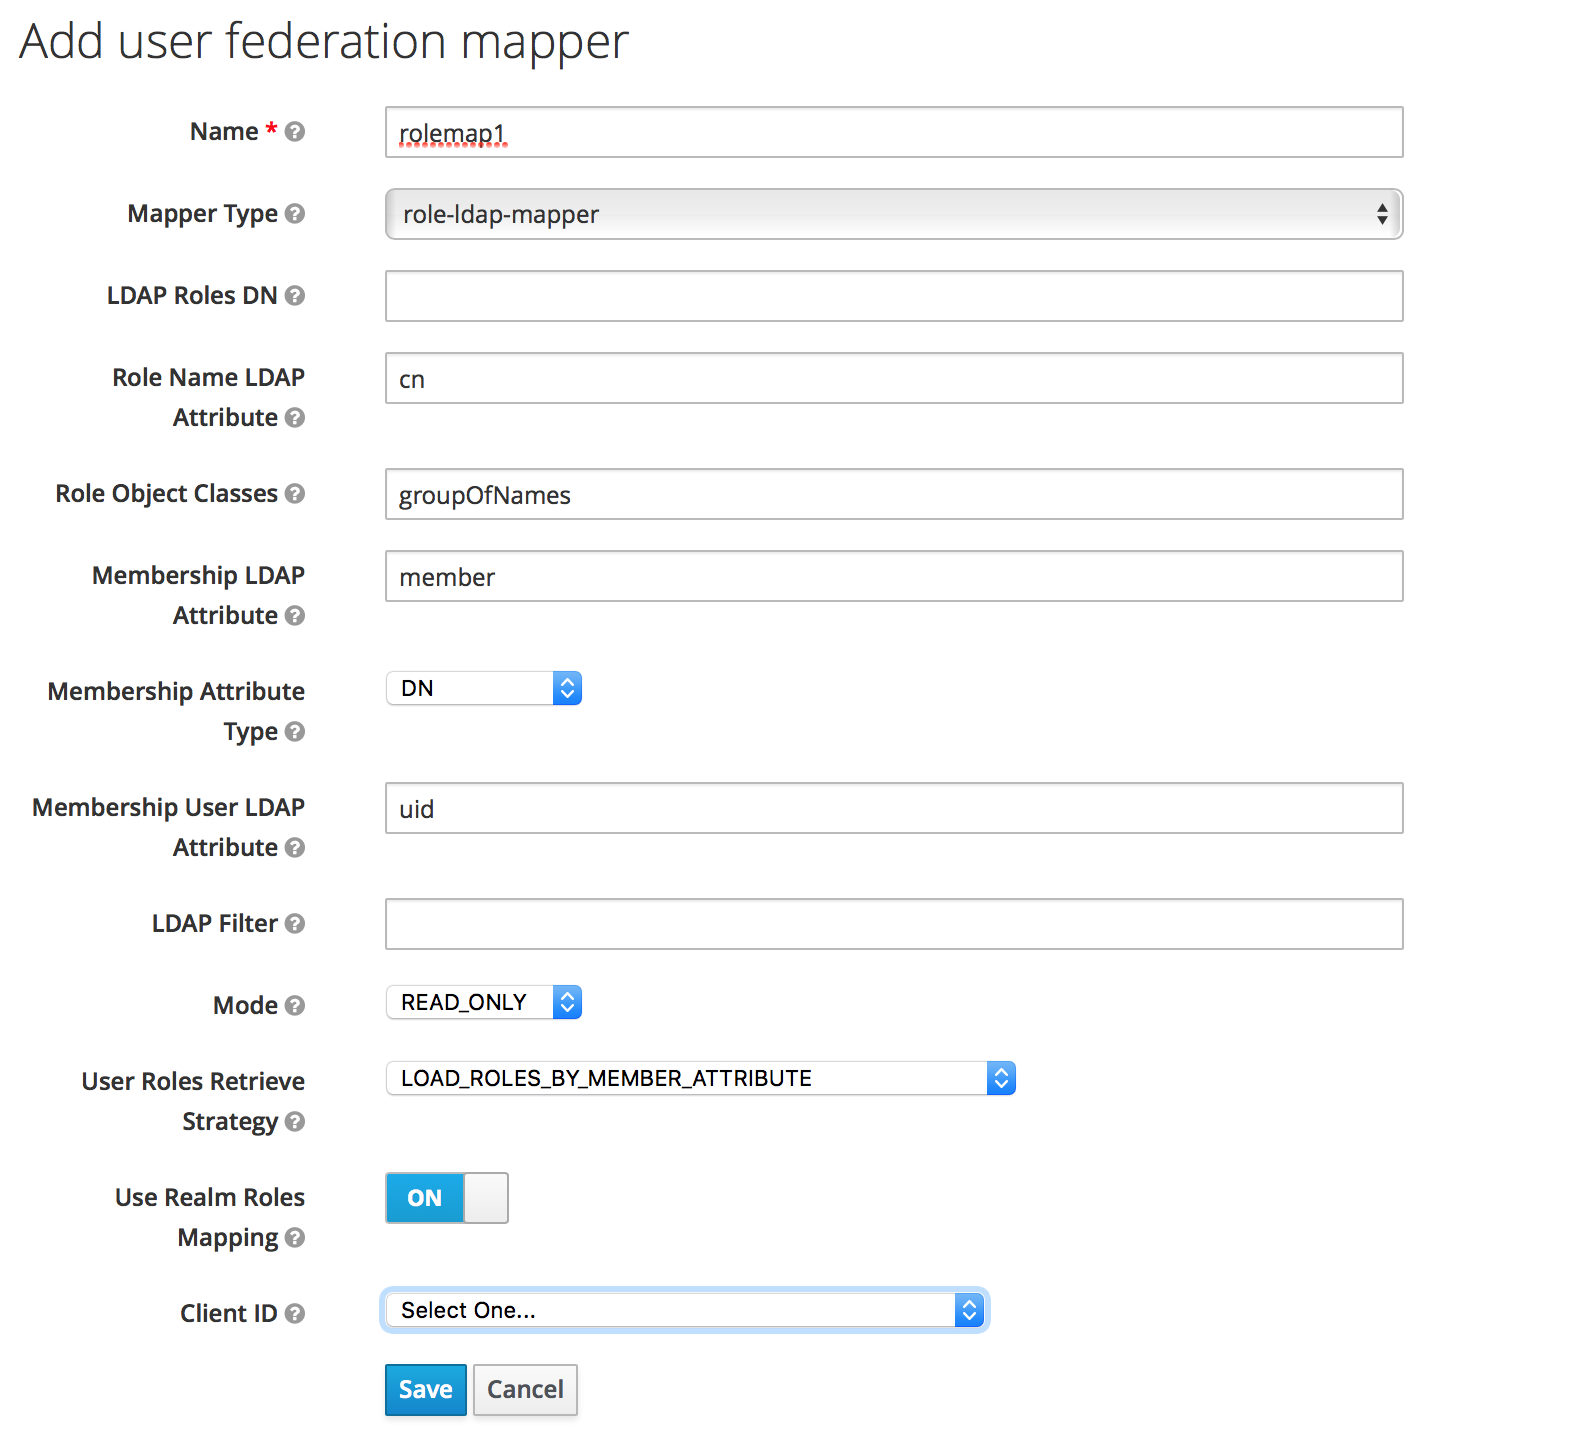
Mapper configuration example#
To map LDAP group membership to Anaconda Platform roles, use a role mapper.
Add a mapper of the role-ldap-mapper type:
In consultation with your LDAP administrator and internal LDAP documentation, define which LDAP group
tree will be mapped into roles in the Anaconda Platform realm. The roles are mapped directly by
name, so an LDAP membership of ae-deployer will map to the role of the same name in Anaconda Platform.
Configuring LDAPS (Outbound SSL)#
To make correct requests to secure internal resources such as internal enterprise LDAP servers using corporate SSL certificates, you must configure a “trust store”. This is optional. If your internal servers instead use certificates issued by a public root CA, then the default trust store is sufficient.
To create a trust store, you must have the public certificates you wish to trust available.
Note
These are certificates for your trusted server such as Secure LDAP, not for Workbench.
Option 1#
If the CA certificates are directly available to you, run the following command, replacing CAFILE.cert with your CA certificate file:
keytool -import -file CAFILE.cert -alias auth -keystore LDAPS.jks
Note
If you want to add an intermediate certificate, run this command again with a unique alias, to include it in the LDAPS.jks file.
Option 2#
Alternatively, if you also have the server certificate and key, you can construct a full trust chain in the store.
Convert the certificate and key files to PKCS12 format—if they are not already—by running the following command:
openssl pkcs12 -export -chain -in CERT.pem -inkey CERT-KEY.pem -out PKCS-CHAIN.p12 -name auth -CAfile CA-CHAIN.pem
In this example, replace
CERT.pemwith the server’s certificate,CERT-KEY.pemwith the server’s key,PKCS-CHAIN.p12with a temporary file name, andCA-CHAIN.pemwith the trust chain file (up to the root certificate of your internal CA).Create a Java keystore to store the trusted certs:
keytool -importkeystore -destkeystore LDAPS.jks -srckeystore PKCS-CHAIN.p12 -alias auth
You will be prompted to set a password. Record the password.
Final steps#
For both options, you’ll need to follow the steps below to expose the certificates to the Workbench Auth service:
Export the existing SSL certificates for your system by running the following commands:
sudo gravity enter
kubectl get secrets anaconda-enterprise-certs --export -o yaml > /opt/anaconda/secrets-exported.yml
Exit the gravity environment, and back up the secrets file before you edit it:
cp secrets-exported.yml secrets-exported-orig.yml
Run the following command to encode the newly created truststore as
base64:base64 -i --wrap=0 LDAPS.jks >> OUTPUT.jks
Copy the output of this command, and paste it into the
datasection of thesecrets-exported.ymlfile.Run the following commands to update Workbench with the secrets certificate:
sudo gravity enter
kubectl replace -f /opt/anaconda/secrets-exported.yml
Verify that the
LDAPS.jksentry has been added to the secret:kubectl describe secret anaconda-enterprise-certs
Edit the platform configuration by setting the
auth.https.truststoreconfiguration key to/etc/secrets/certs/ldaps.jks, andauth.https.truststore-passwordto the matching password. For example, after editing, it should resemble the following: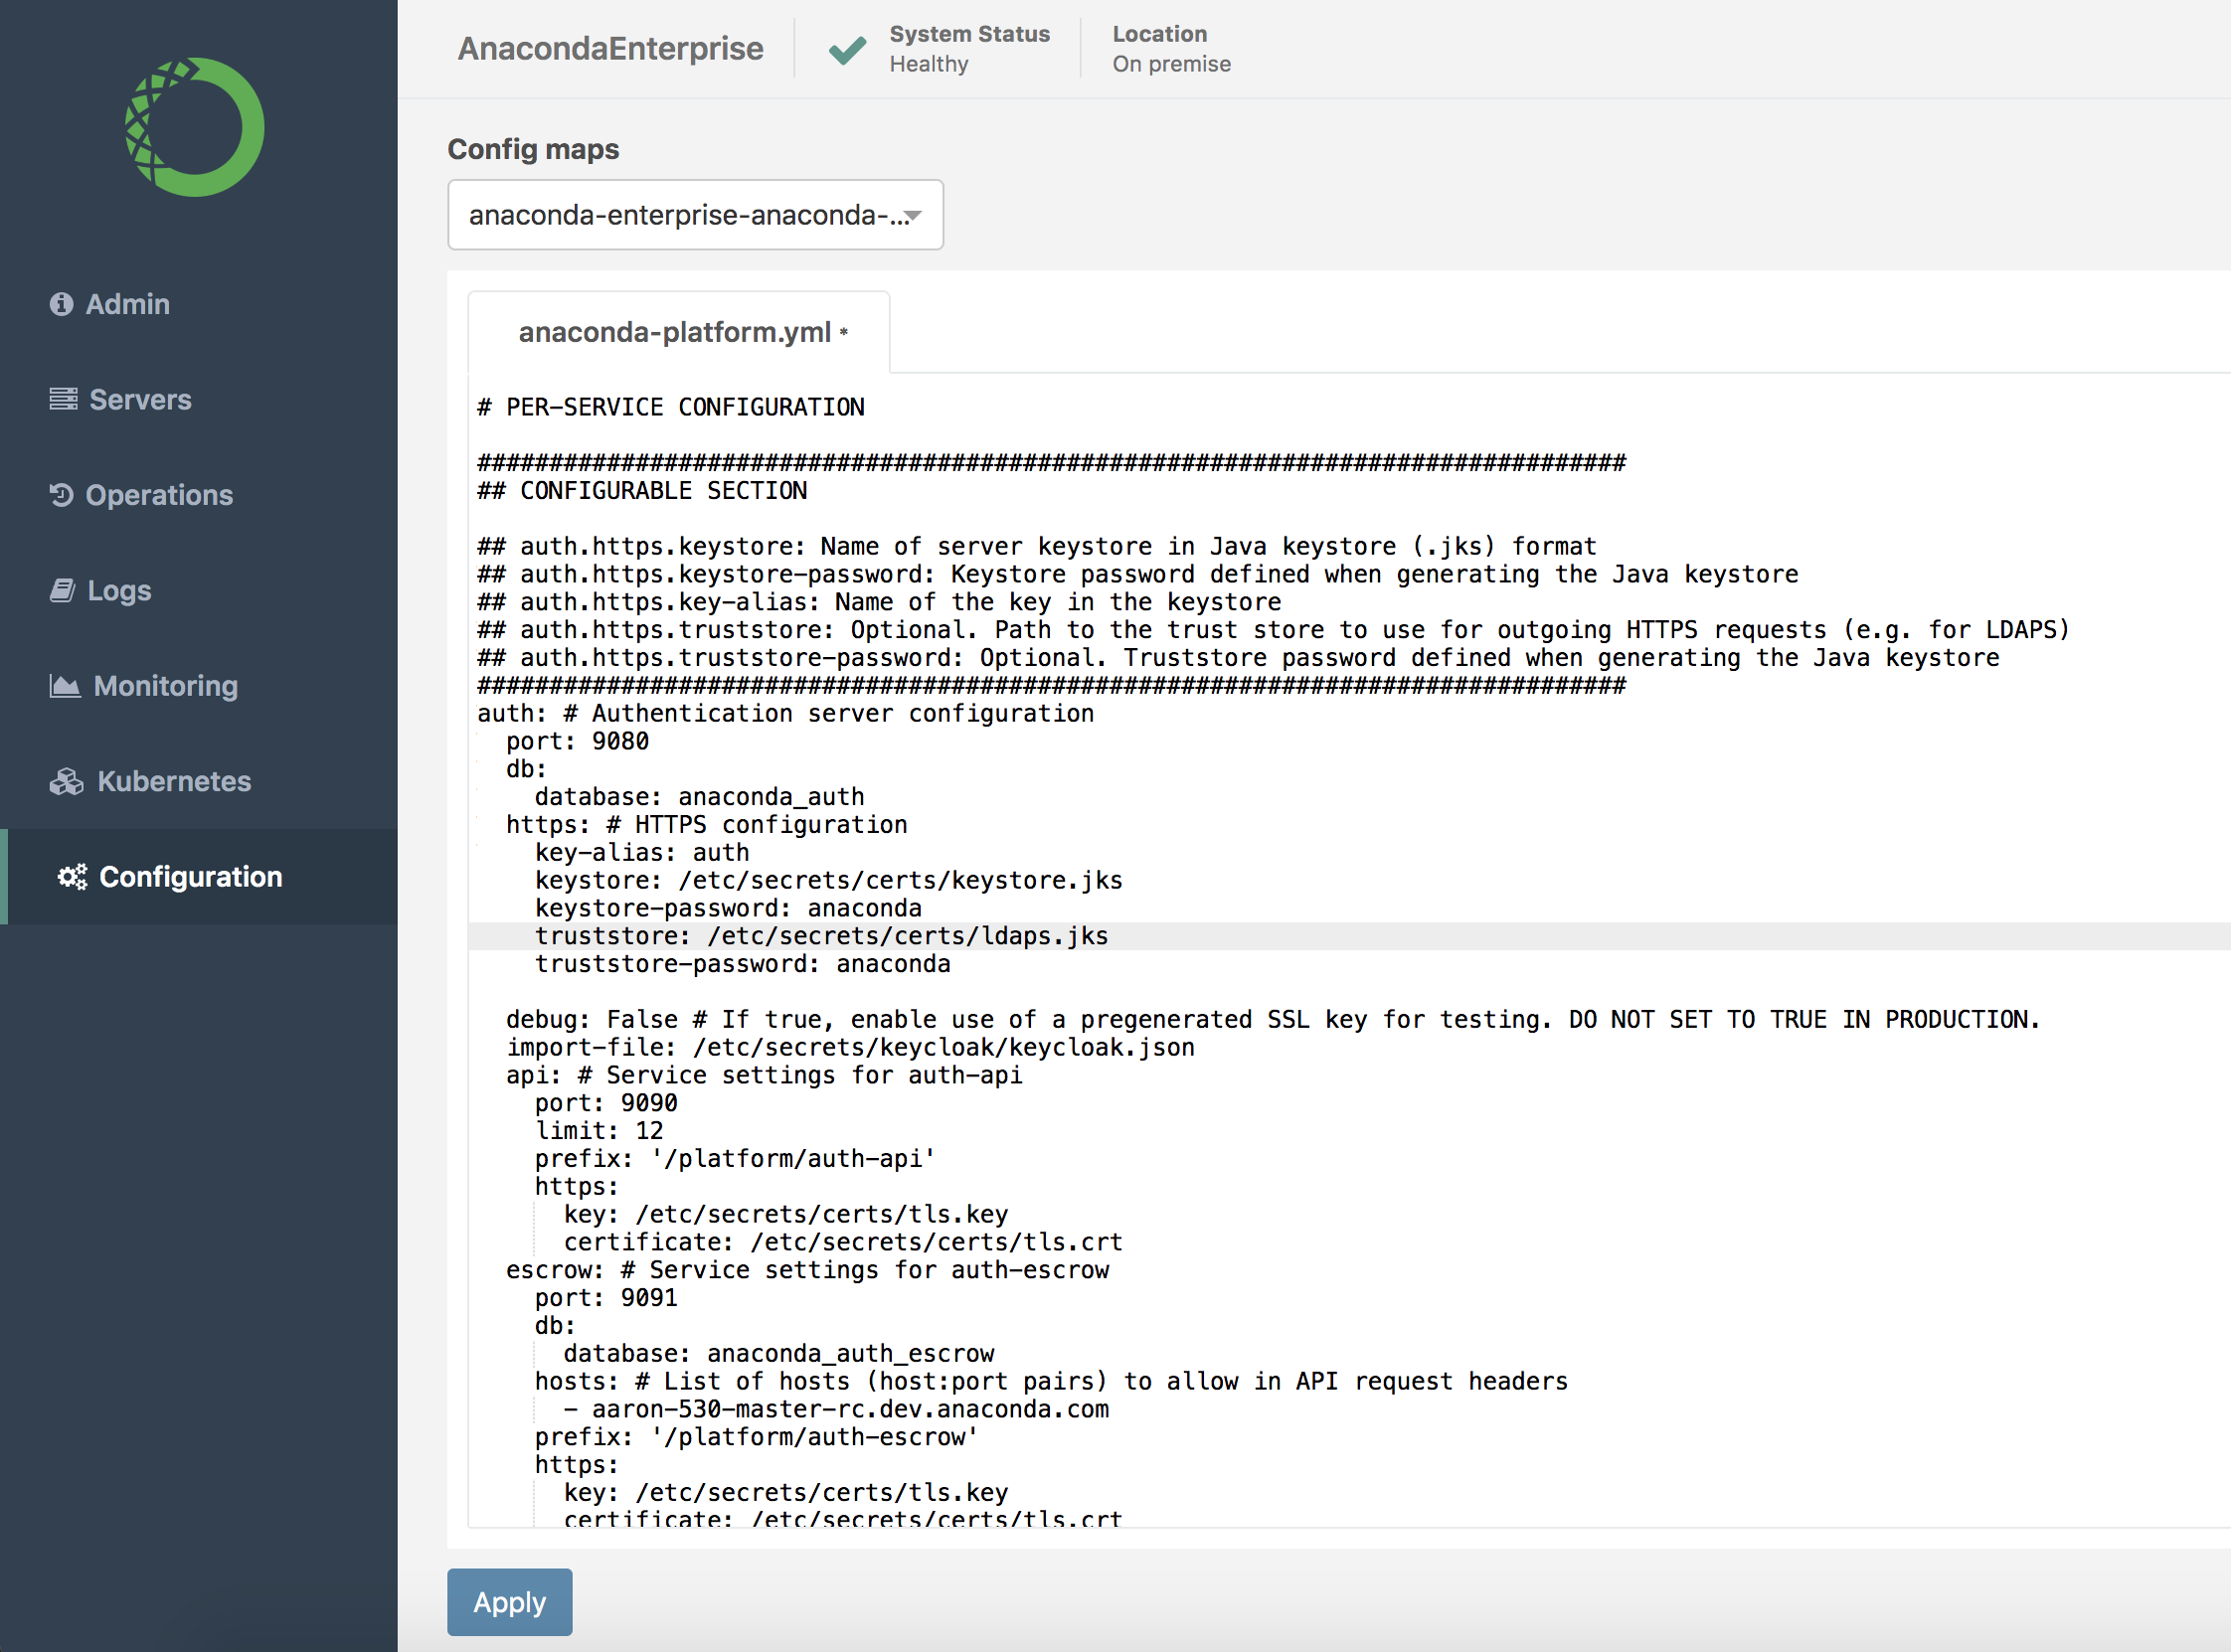
Run the following commands to restart the
authservice:sudo gravity enter kubectl get pods | grep ap-auth | cut -d' ' -f1 | xargs kubectl delete pods
Caution
If you are using Workbench version 5.6.0, you must also complete the following steps to finish your LDAPS configuration. If you do not, your LDAPS configuration will not connect successfully.
Create a backup of your current auth configuration:
kubectl get deployment anaconda-enterprise-ap-auth -o yaml > auth.yaml
Edit the auth pod deployment:
kubectl edit deployment anaconda-enterprise-ap-auth
Add the below to the
JAVA_OPTSkey/value:-Djavax.net.ssl.trustStore=/etc/secrets/certs/ldaps.jks -Djavax.net.ssl.trustStorePassword=anaconda
Save your changes