Managing users#
Managing access to Data Science & AI Workbench involves adding and removing users, setting passwords, mapping users to roles, and optionally assigning them to groups. To help expedite the process of authorizing large groups of users at once, you can connect to an external identity provider using LDAP, Active Directory, SAML, or Kerberos to federate those users.
Note
To be able to perform these actions, you’ll need the appropriate login credentials required to access the Administrative Console’s Authentication Center.
The process of authorizing Operations Center Admins is slightly different. See Managing System Administrators for more information.
Creating and configuring users#
To access the Authentication Center:
Login to Workbench, click the Menu icon
 in the top right corner, then click the Administrative Console link in the bottom of the slideout menu.
Click Manage Users.
If this is the first time accessing the Authentication Center, log in using the default
admincredentials. Otherwise, use the credentials that grant you Admin privileges in the Authentication Center.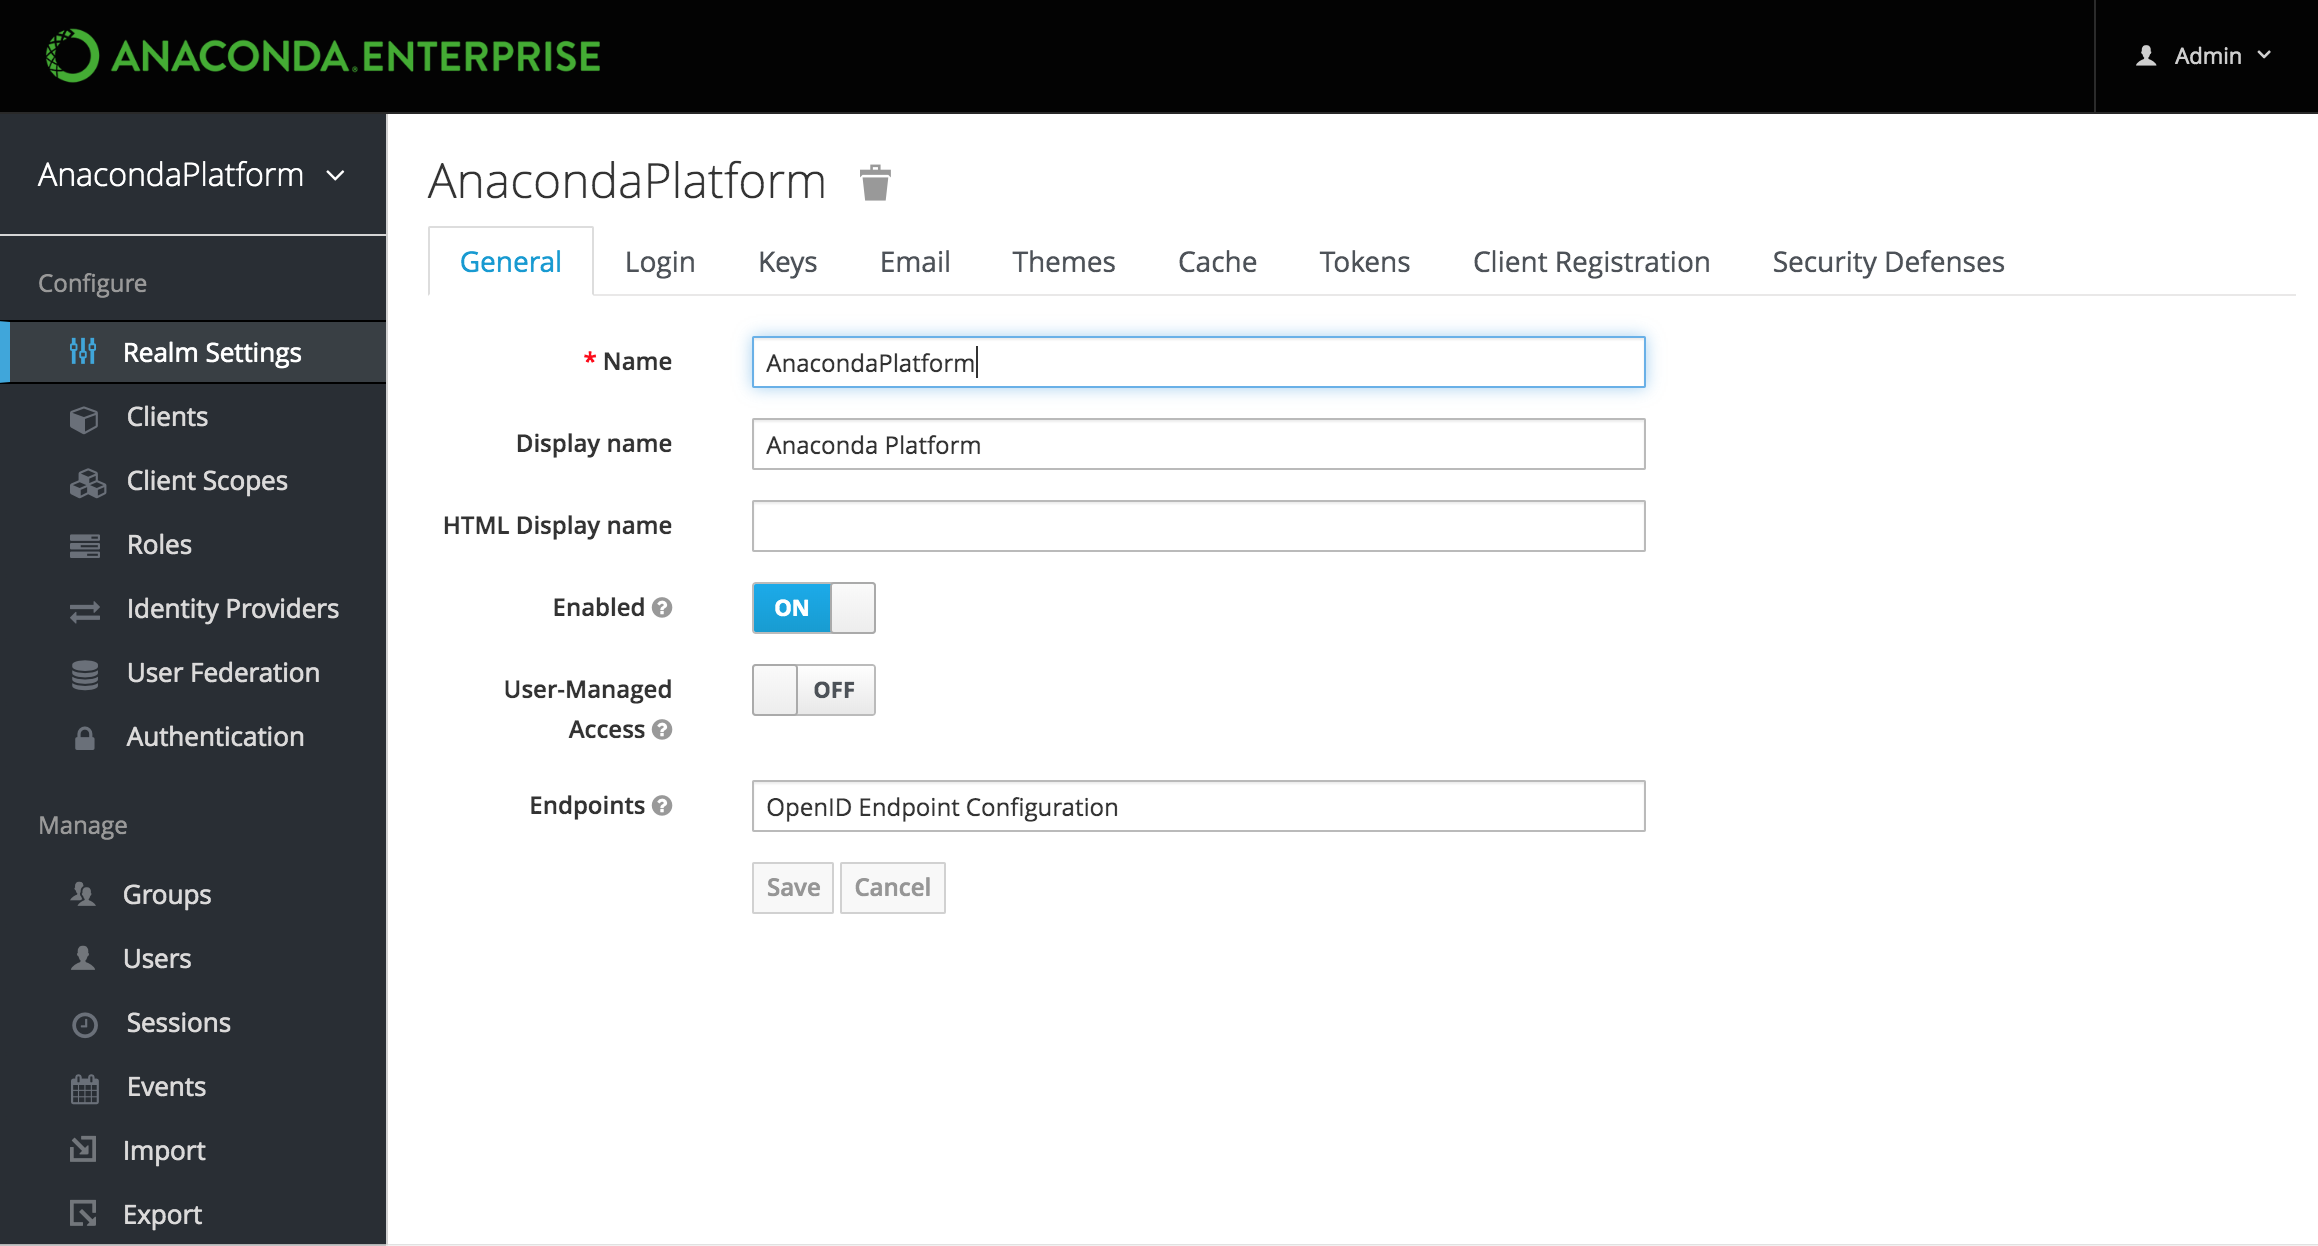
Note
To create and manage other Authentication Center Admins, use the realm selector in the upper left corner to switch to the Master realm before proceeding.
In the Manage menu on the left, click Users.
On the Lookup tab, click View all users to list every user in the system, or search the user database for all users that match the criteria you enter, based on their first name, last name, or email address.
Note
This will search the local user database and not the federated database (such as LDAP) because not all external identity provider systems include a way to page through users. If you want users from a federated database to be synced into the local database, select User Federation in the Configure menu on the left, and adjust the Sync Settings for your user federation provider.
To create a new Workbench user, click Add user and specify a user name—and optionally provide values for the other fields—before clicking Save.
Note
Usernames containing unicode characters—special characters, punctuation, symbols, spaces—are not permitted.
To configure a user, click the user’s ID in the list and use the available tabs as follows:
Use the Details tab to specify information for the user, optionally enable user registration and required actions and impersonate the user. If you include an email address, an invitation to join Workbench will be sent to the email address specified.
Use the Credentials tab to manage the user’s password. If the Temporary switch is on, this new password can only be used once—the user will be asked to change their password after they use it to log in to Workbench.
Use the Role Mappings tab to assign the user one or more roles, and the Groups tab to add them to one or more groups. See managing roles and groups for more information.
Note
To grant Authentication Center Administrators sufficient authority to manage Workbench users, you’ll need to assign them the
adminrole.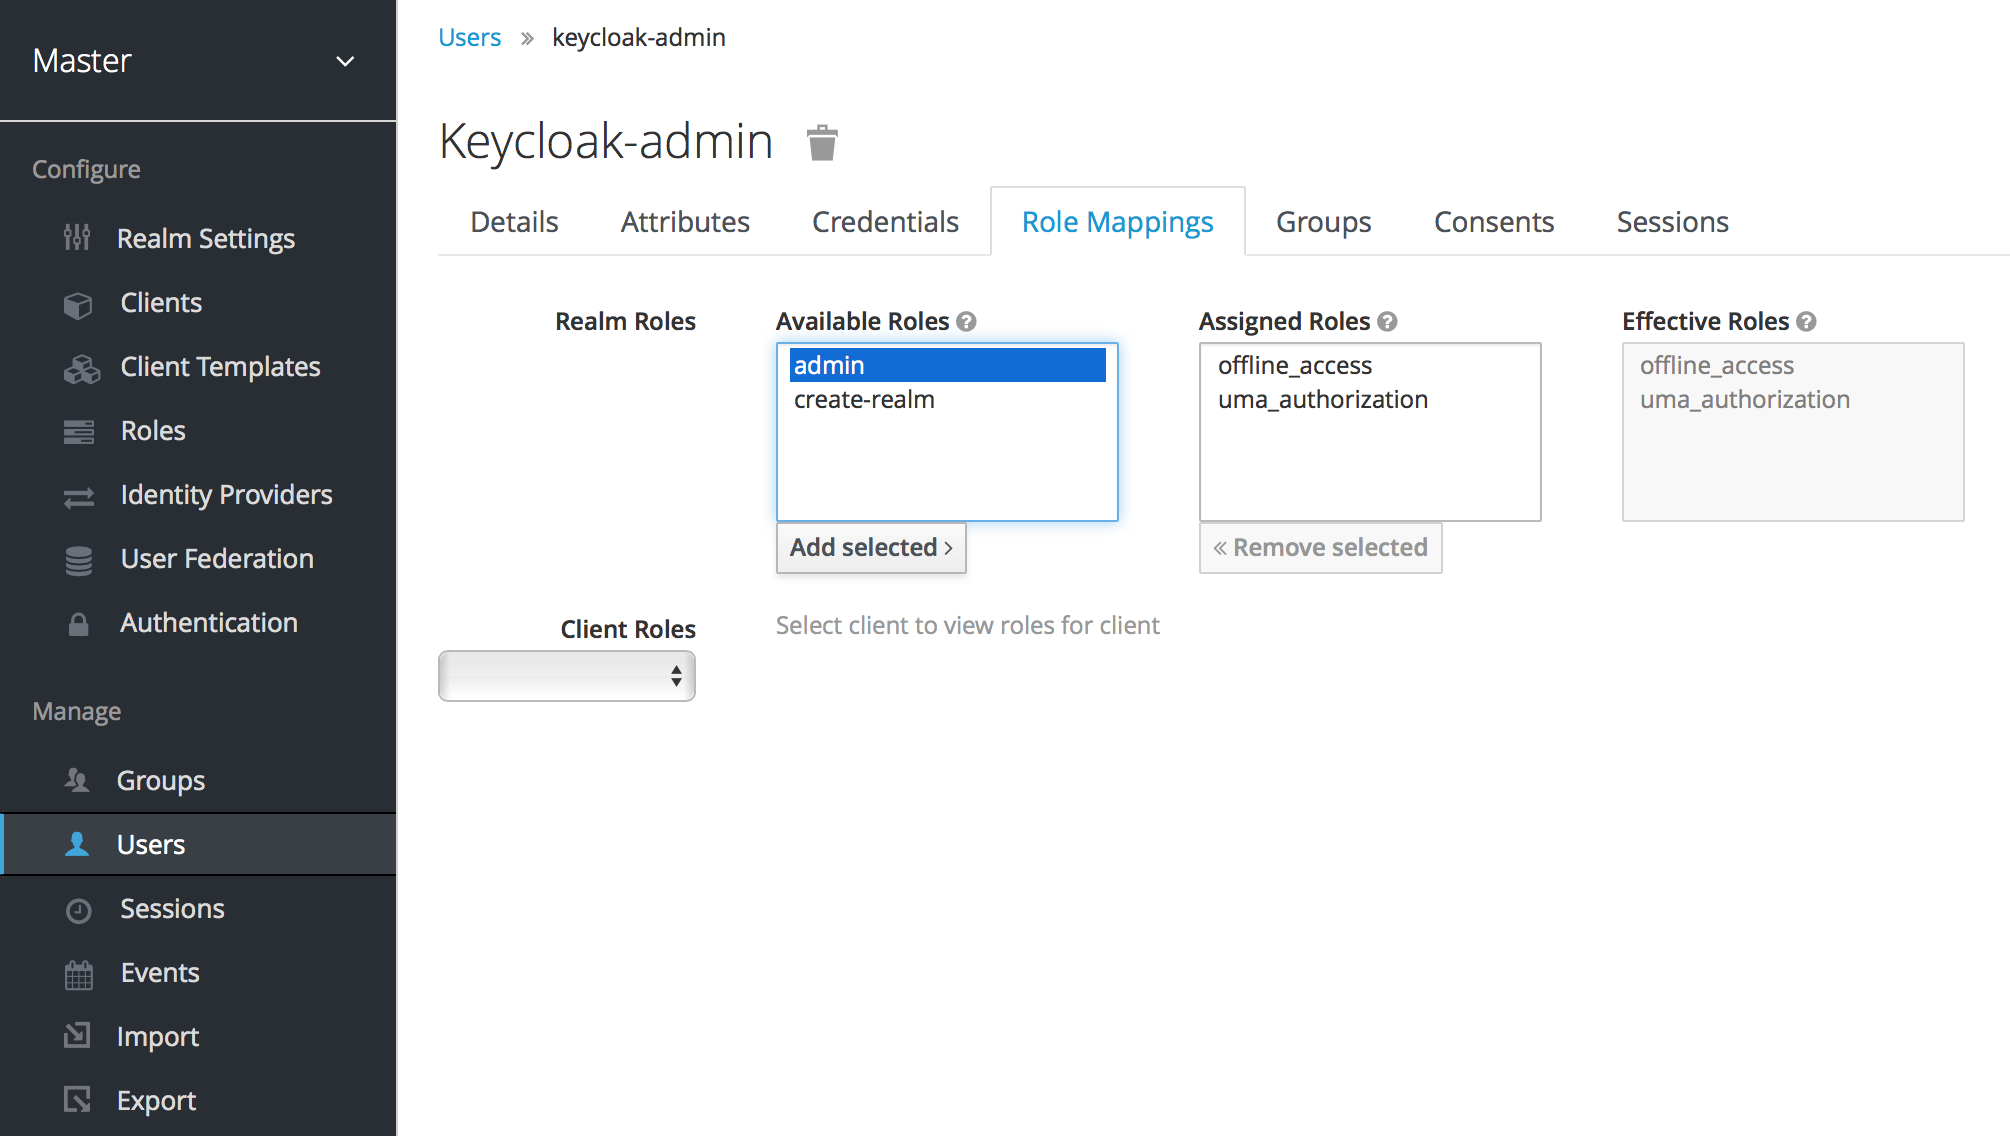
Use the Sessions tab to view a summary of all sessions the user has started, and log them out of all sessions in a single click. This is handy if a user goes on vacation without logging out of their sessions. You can use the Operations Center to view a summary of all sessions running on specific nodes or by specific users. See monitoring sessions and deployments for more information.
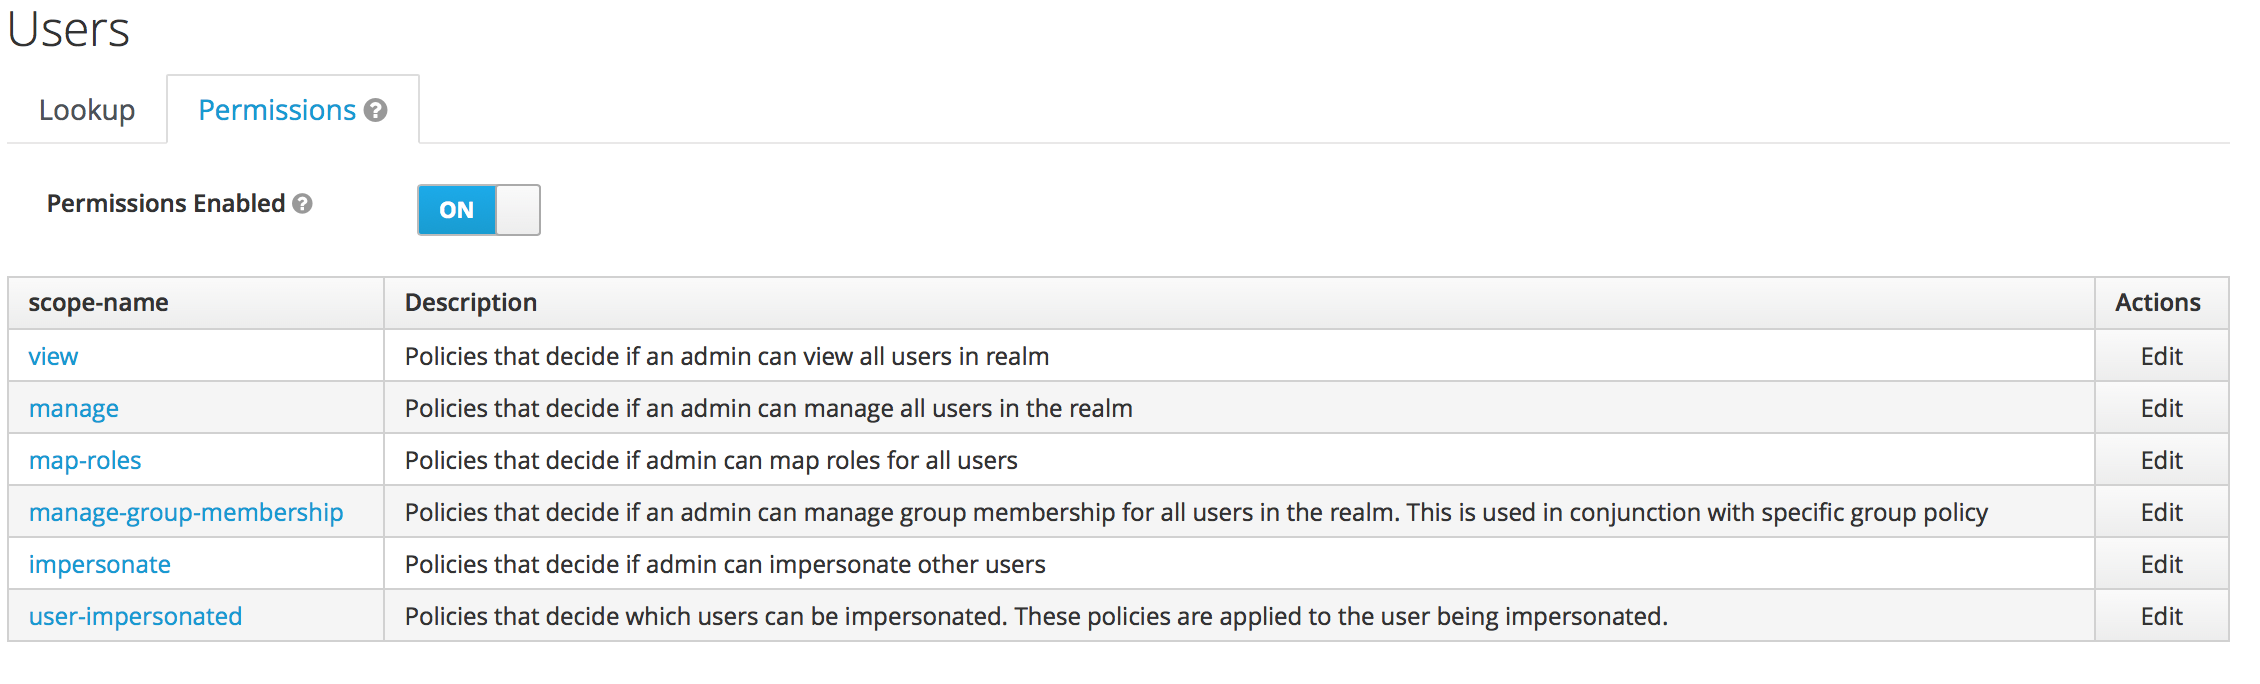
To view and edit a set of fine grain permissions that you can enable and use to define policies for allowing other users to manage users in the selected realm, return to the Users list and select the Permissions tab:
Add a new master realm admin user/Reset password#
Follow these steps from the command line to add a new admin user to the master realm or to reset your admin password if you’re locked out or have forgotten your password.
Exec into the Keycloak container:
# Replace <KEYCLOAK_CONTAINER_ID> with your keycloak container ID
docker exec -it <KEYCLOAK_CONTAINER_ID> /bin/bash
Create a user:
# Replace <USERNAME> with your username and <PASSWORD> with your password
/opt/jboss/keycloak/bin/add-user-keycloak.sh -u <USERNAME> -p <PASSWORD> -r master --roles=admin
Restart the server. Restarting the server will delete the container and any current state:
/opt/jboss/keycloak/bin/standalone.sh -Djboss.socket.binding.port-offset=100
Log in to Keycloak from the following URL:
# Replace <FQDN> with your fully qualified domain name
<https://<FQDN>/auth/admin/master/console>.
Enabling user registration#
You can use the Authentication Center to enable users to self register and create their own account. When enabled, the login page will have a Register link users can click to open the registration page where they can enter the user profile information and password required to create their new account.
Click Realm Settings under Configure in the menu on the left menu.
Click the Login tab, and enable the User registration switch.
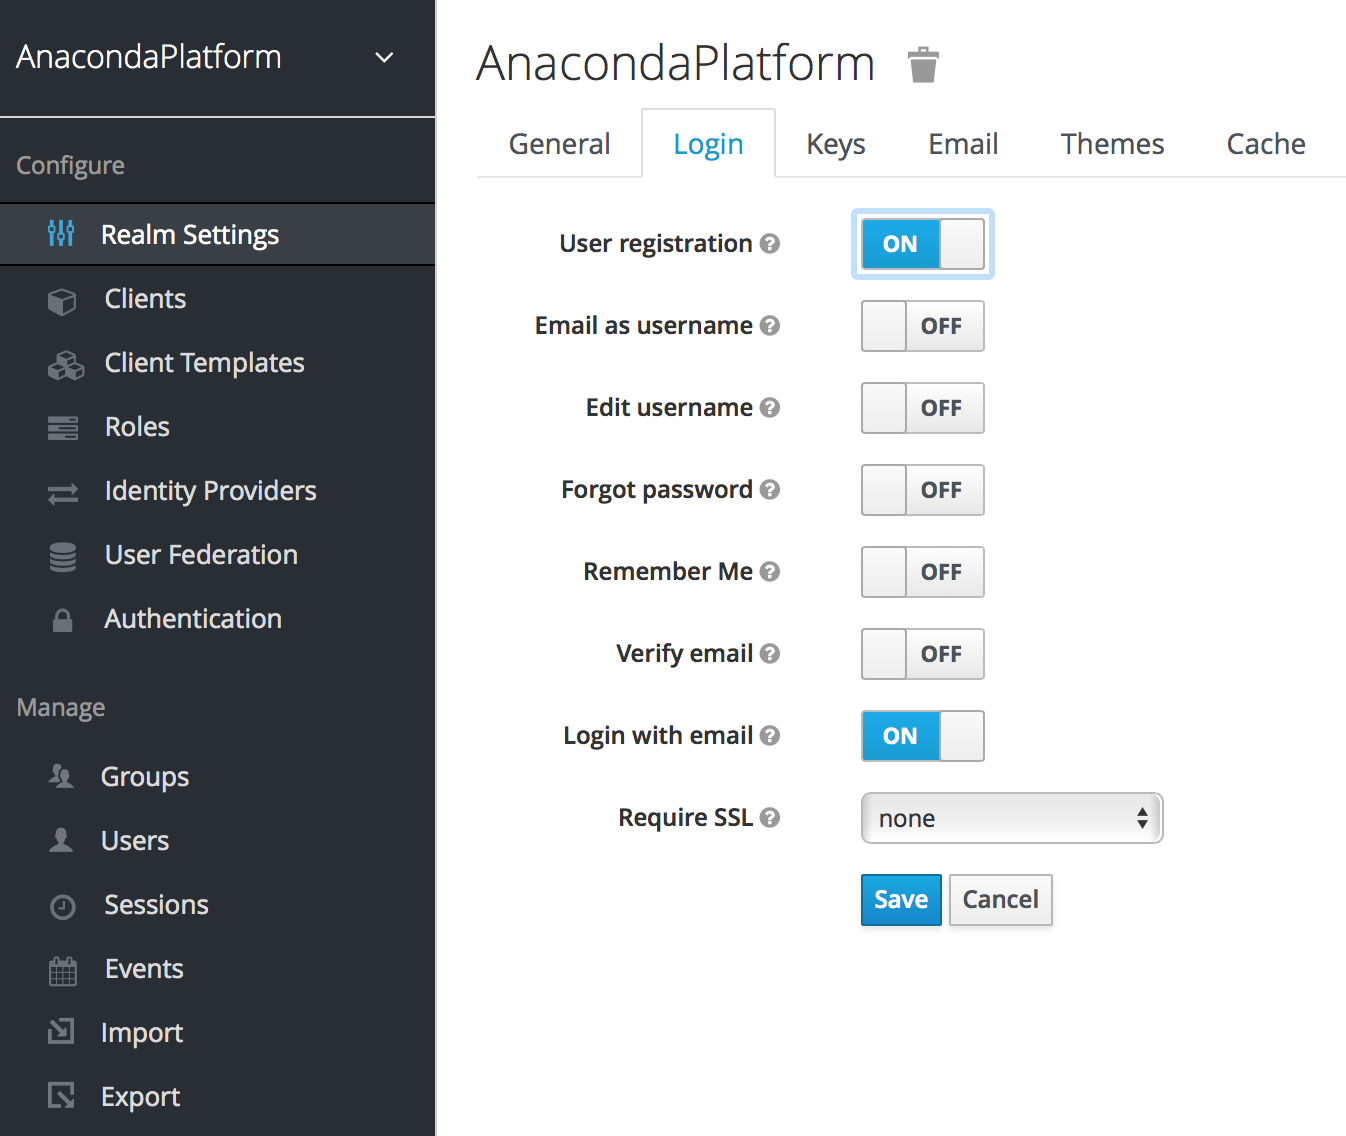
You can change the look and feel of the registration form as well as removing or adding additional fields that must be entered. See the Server Developer Guide for more information.
Enabling required actions#
You can use the Required User Actions drop-down list—on the Details tab for each user—to select the tasks that a user must complete (after providing their credentials) before they are allowed to log in to Workbench:
- Update Profile
This requires the user to update their profile information, such as their name, address, email, and phone number.
- Update Password
When set, a user must change their password.
- Configure OTP
When set, a user must configure a one-time password generator on their mobile device using either the Free OTP or Google Authenticator application.
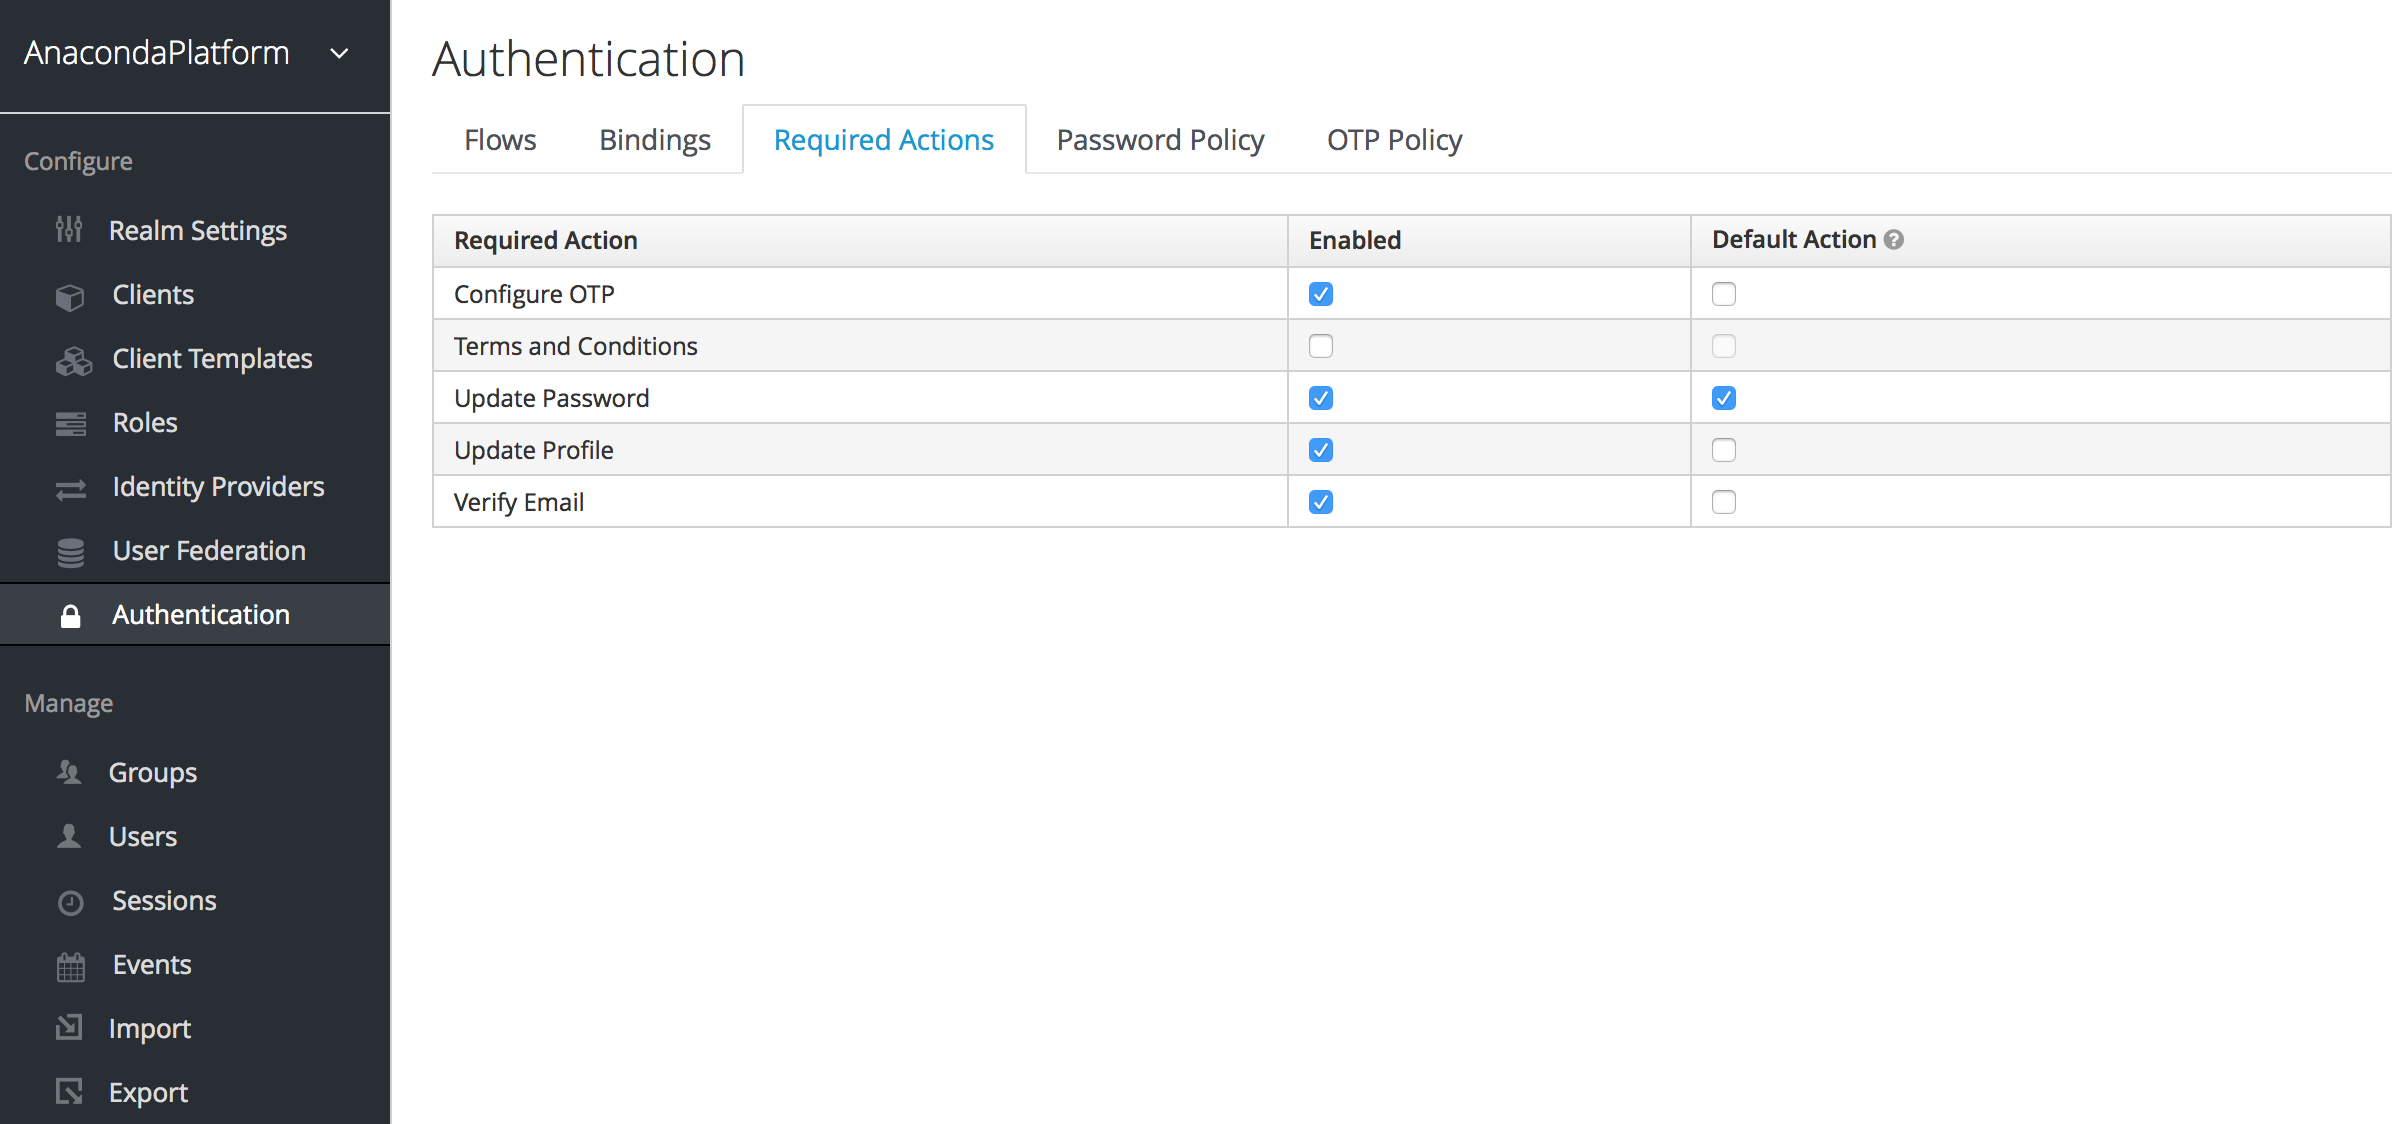
Setting default required actions#
You can specify default required actions that will be added to all new user accounts. Select Authentication from the Configure menu on the left and use the Required Actions tab to specify whether you want each required action to be enabled—available for selection—or also pre-populated as a default for all new users.
Note
A required action must be enabled to be specified as a default.
Using terms and conditions#
Many organizations have a requirement that when a new user logs in for
the first time, they need to agree to the terms and conditions of the
website. This functionality can be implemented as a
required action, but it requires some configuration. In addition to enabling
Terms and Conditions as a required action, you must also edit the terms.ftl file
in the base login theme. See the Server Developer Guide
for more information on extending and creating themes.
Impersonating users#
It is often useful for an Administrator to impersonate a user. For example, a user may be experiencing an issue using an application and an Admin may want to impersonate the user to see if they can duplicate the problem.
Note
Any user with the realm’s impersonation role can impersonate a user.
The Impersonate command is available from both the Users list and the Details tab for a user.
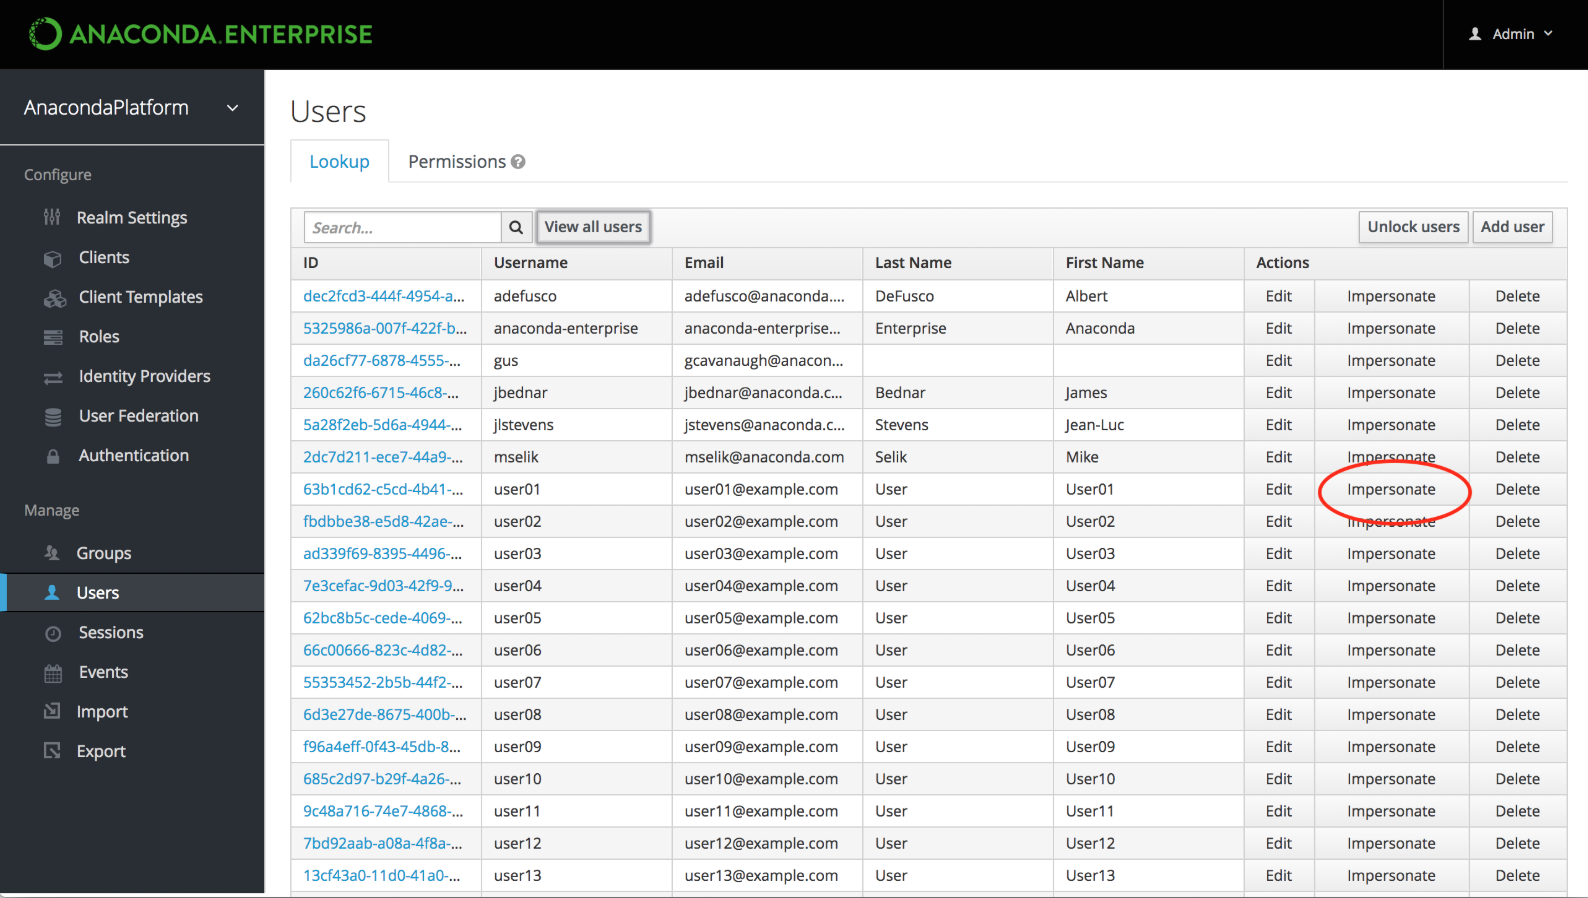
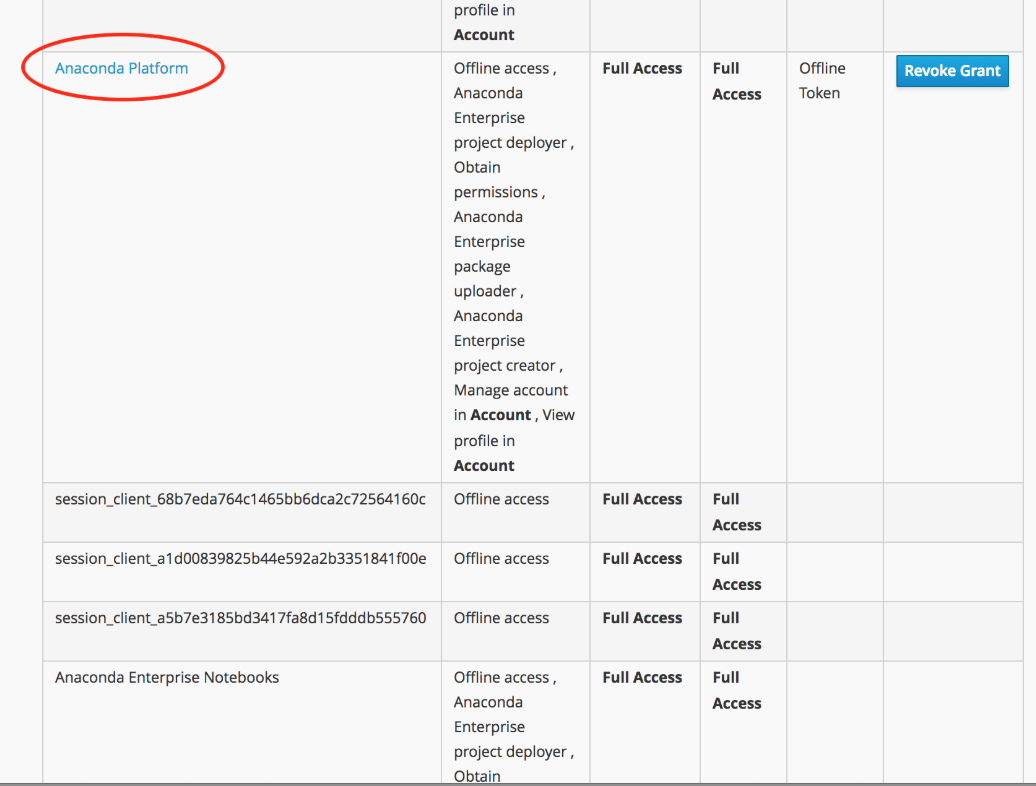
Click Impersonate to display a list of applications the user has accessed on the platform, including editor sessions and deployments.
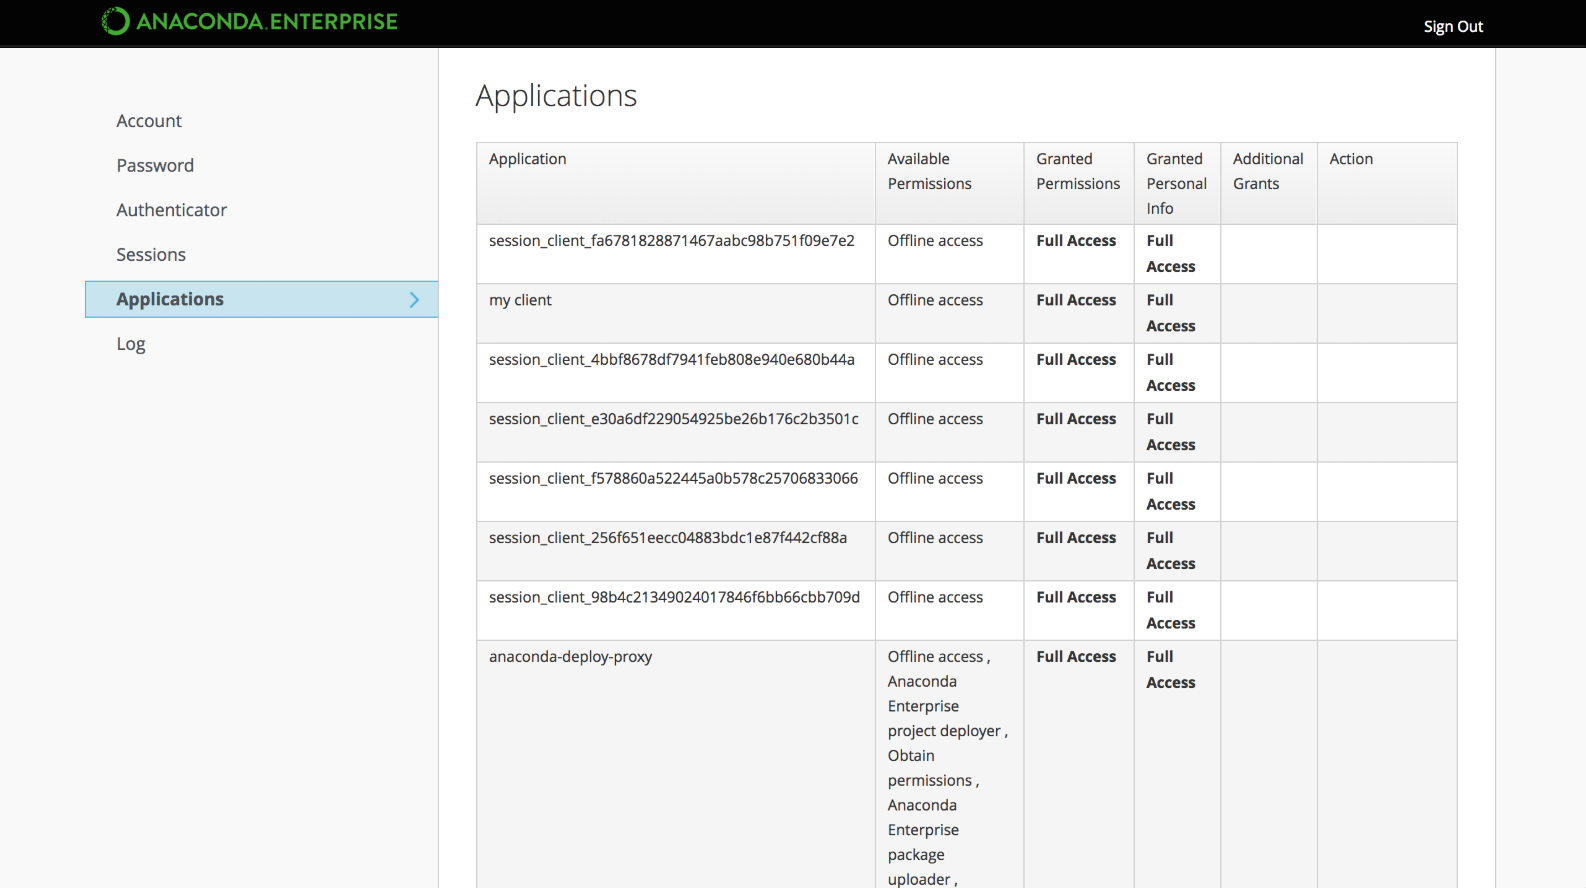
Click the Anaconda Platform link to interact with Workbench as the impersonated user.
Note
If the Admin and the user are in the same realm, the Admin will be logged out and automatically logged in as the user being impersonated. If the Admin and user are not in the same realm, the Admin will remain logged in and be logged in as the user in that user’s realm.